Raw Sensor Data Ingress
Uploading data into Azure is a very important step in the data pipeline. The data must be uploaded in a way that is consistent with the data standards. This section will describe the process of uploading data into Azure.
Please note - you will need a shared access signature (SAS) url to proceed. SAS url’s have strict expiry dates, typcally 21-days. please only request a SAS url from ross pitman (rpitman@naturalstate.org) when you are ready to start uploading data.
Step 1 – go to https://azure.microsoft.com/en-us/products/storage/storage-explorer
Step 2 – begin downloading the application, according to your operation system
Step 3 – install Storage Explorer

Step 4 – click the “attach to a resource” button
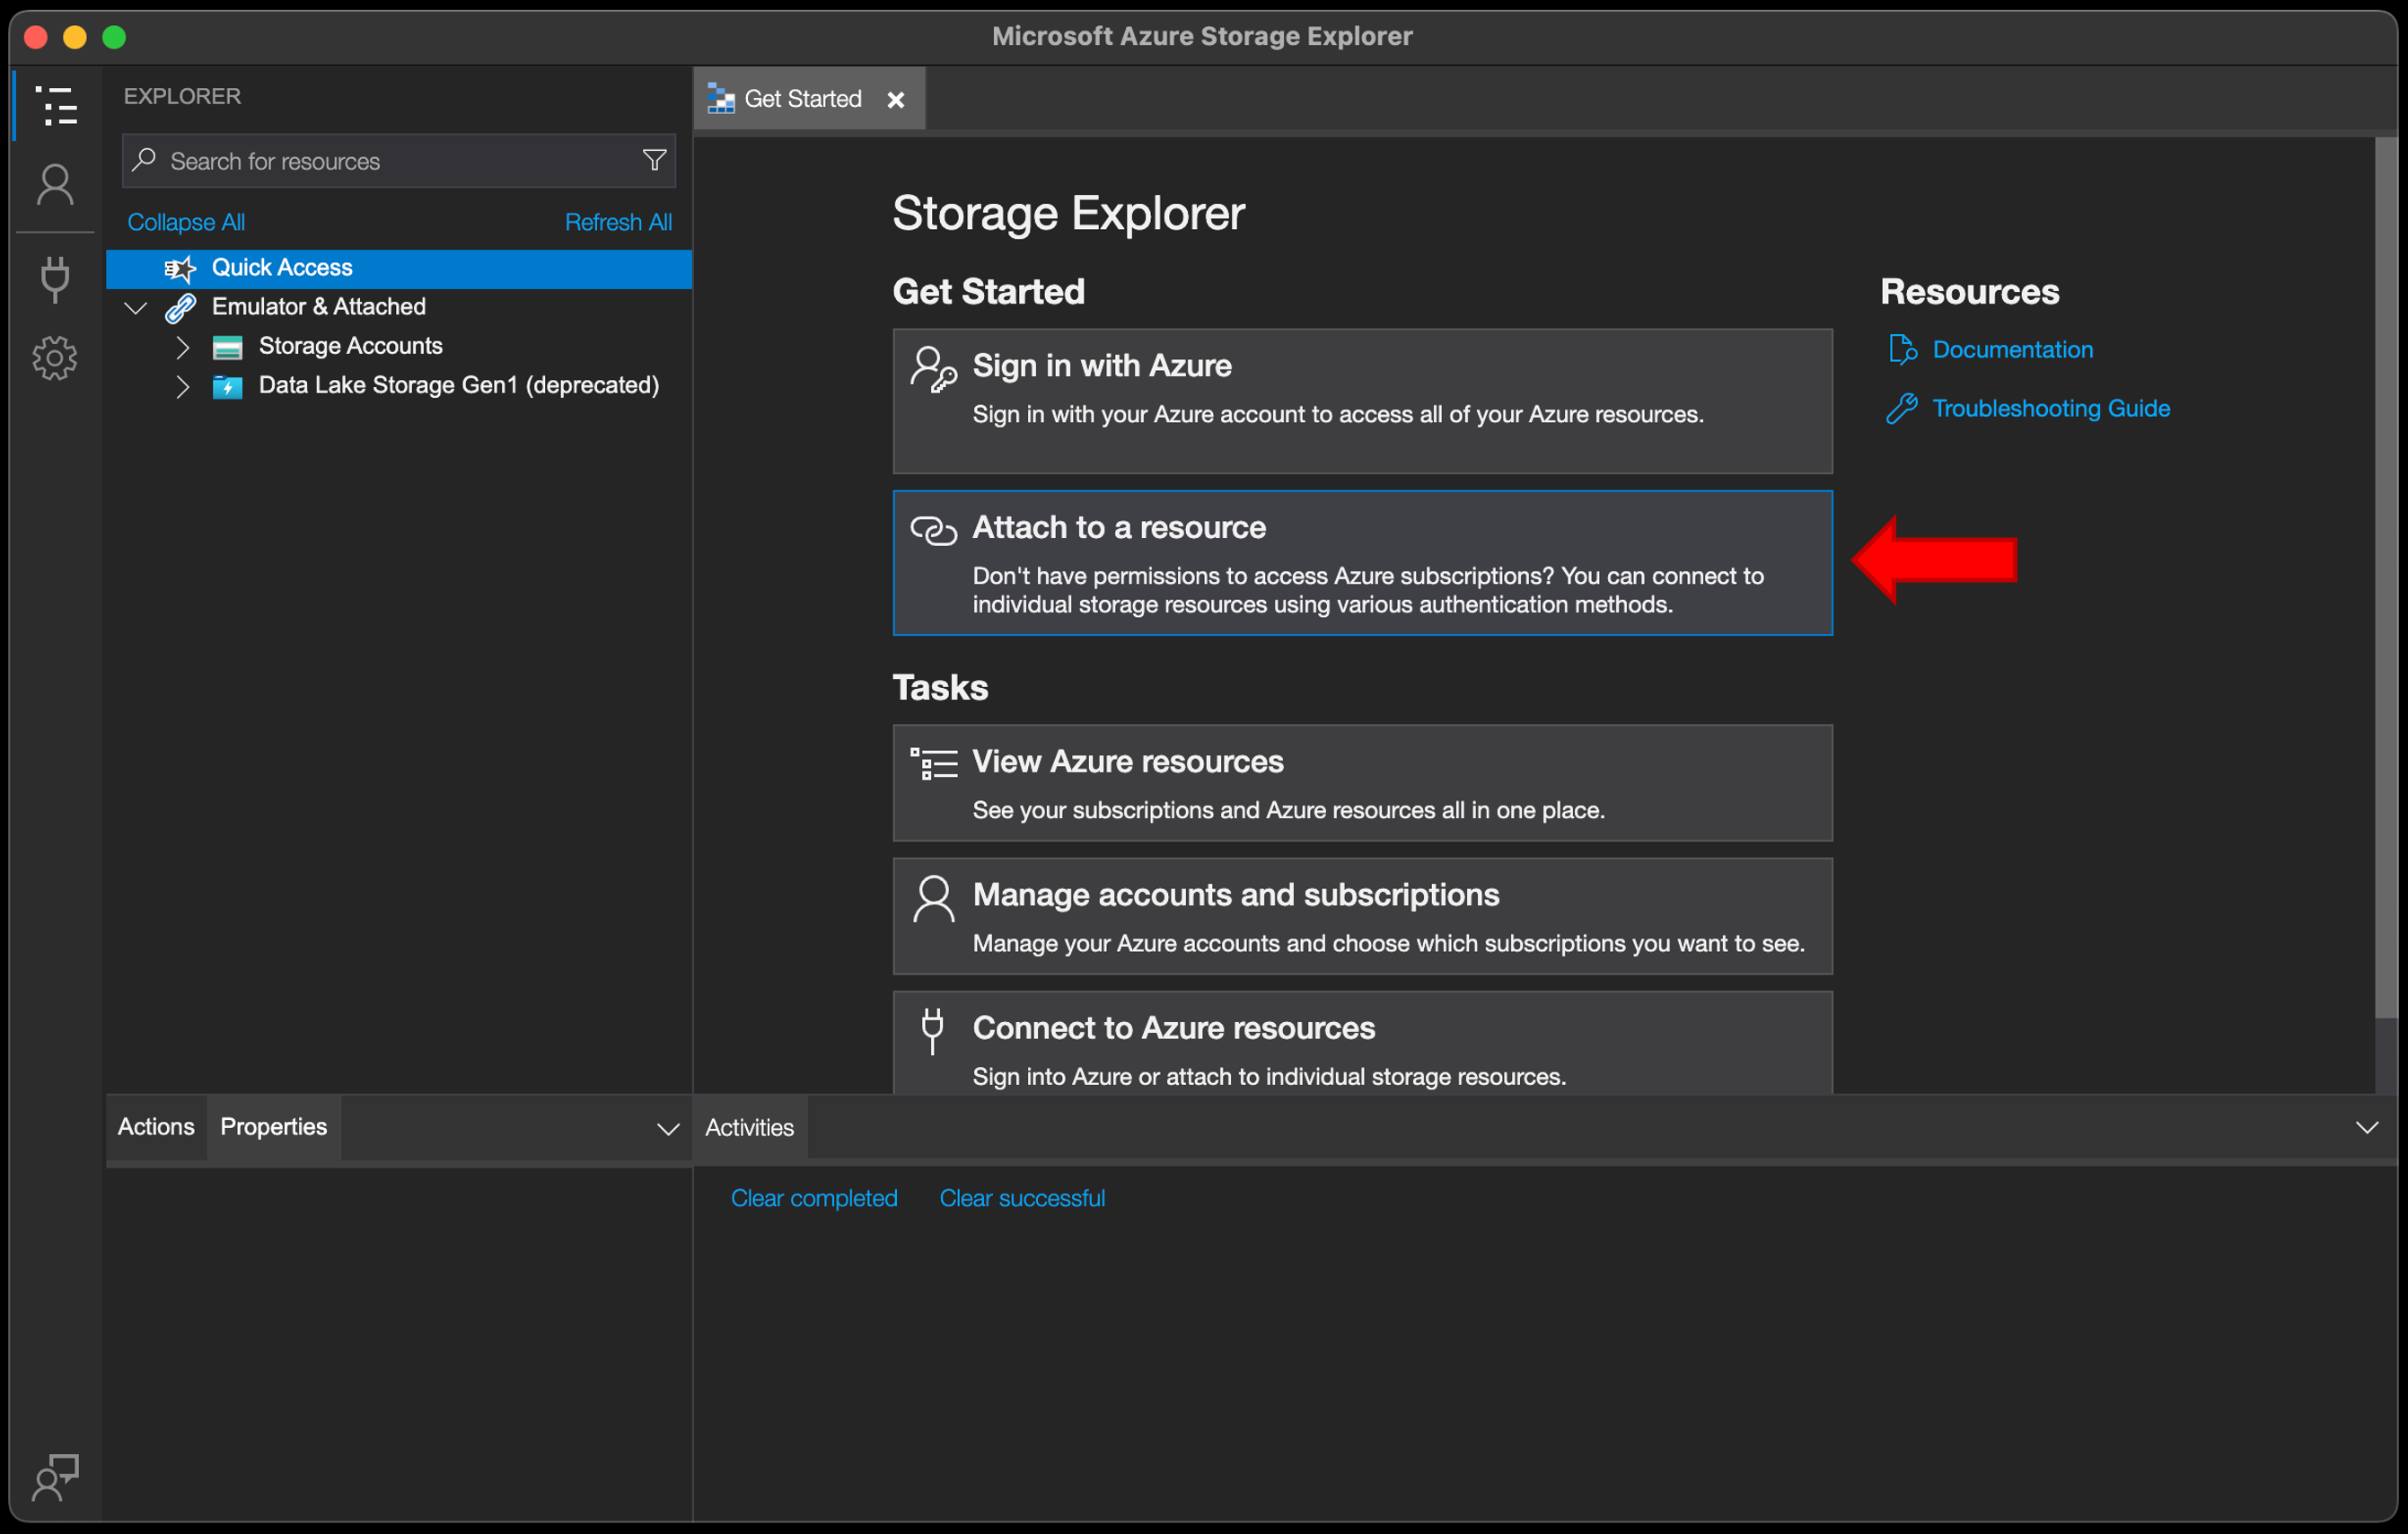
Step 5 – select the “blob container” option (for interest, blob stands for “binary large object”)
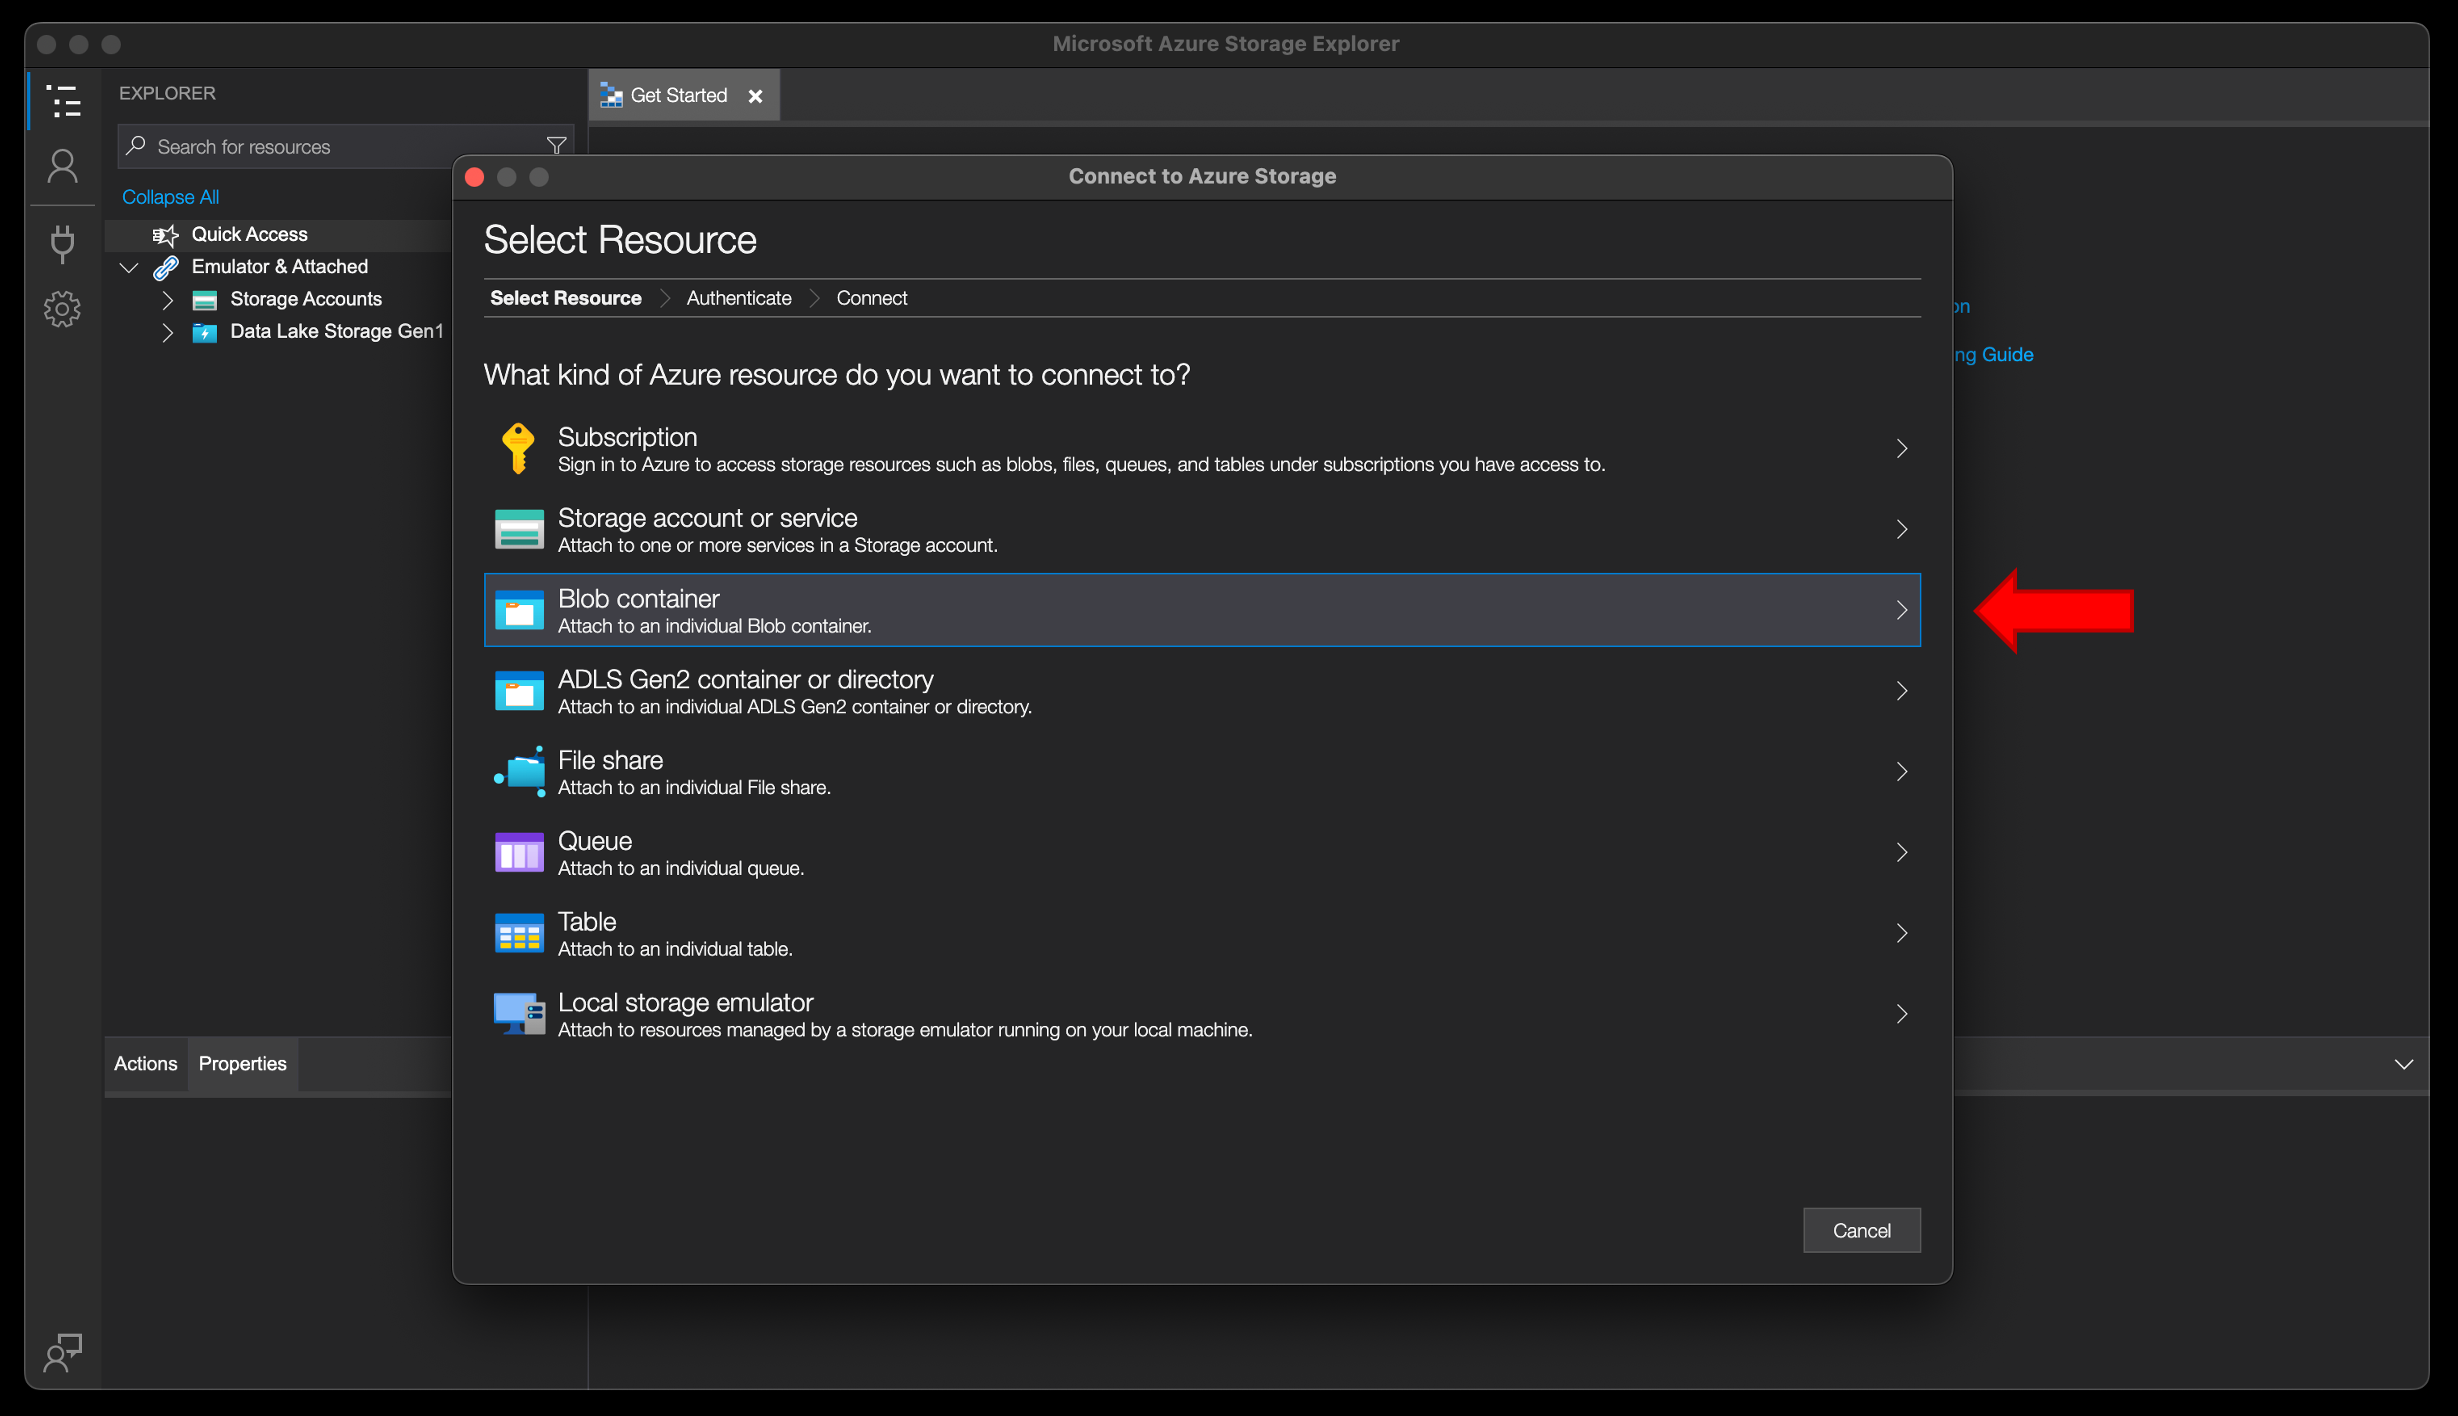
Step 6 – select “shared access signature url (SAS)
Step 7 – click next
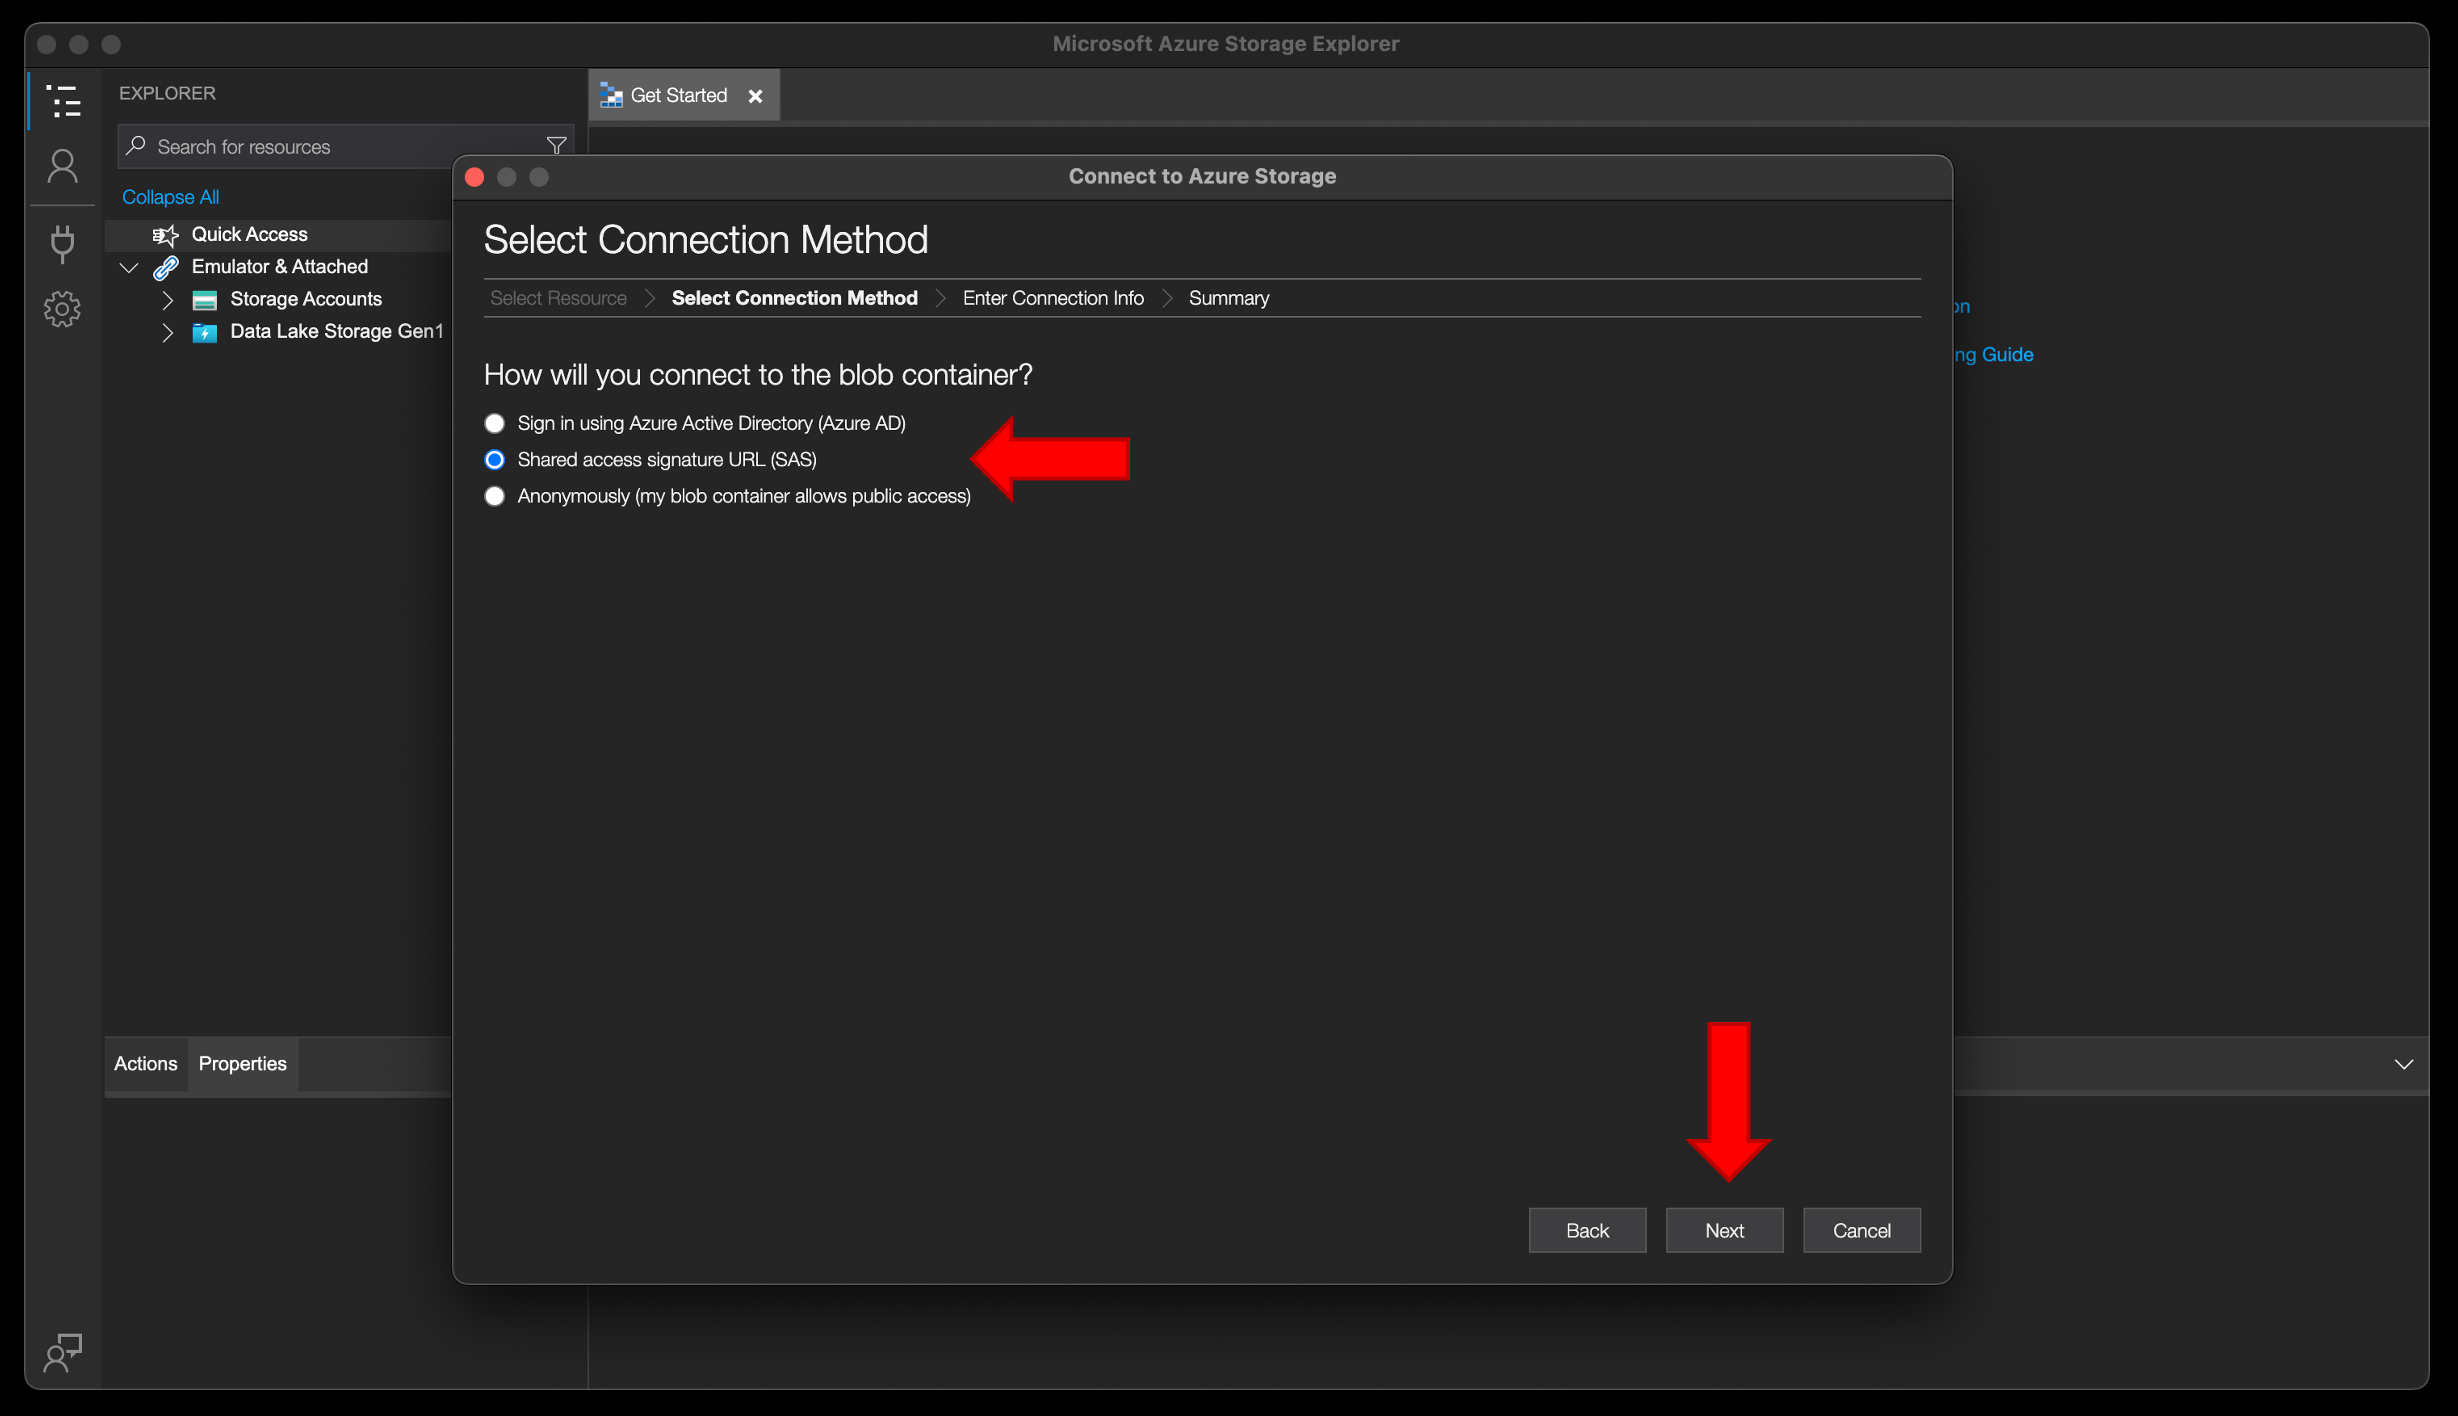
Step 8 – insert a display name (you can choose any name that makes sense to you)
Step 9 – paste the url that ross pitman (rpitman@naturalstate.org) sends you via a service called one-time-secret. A link will arrive via email. Please note: a sas url has a strict expiry date, typcally 21-days for uploading tasks. Please only request a sas url when you know you are going to use it immediately.
Step 10 – click “next”
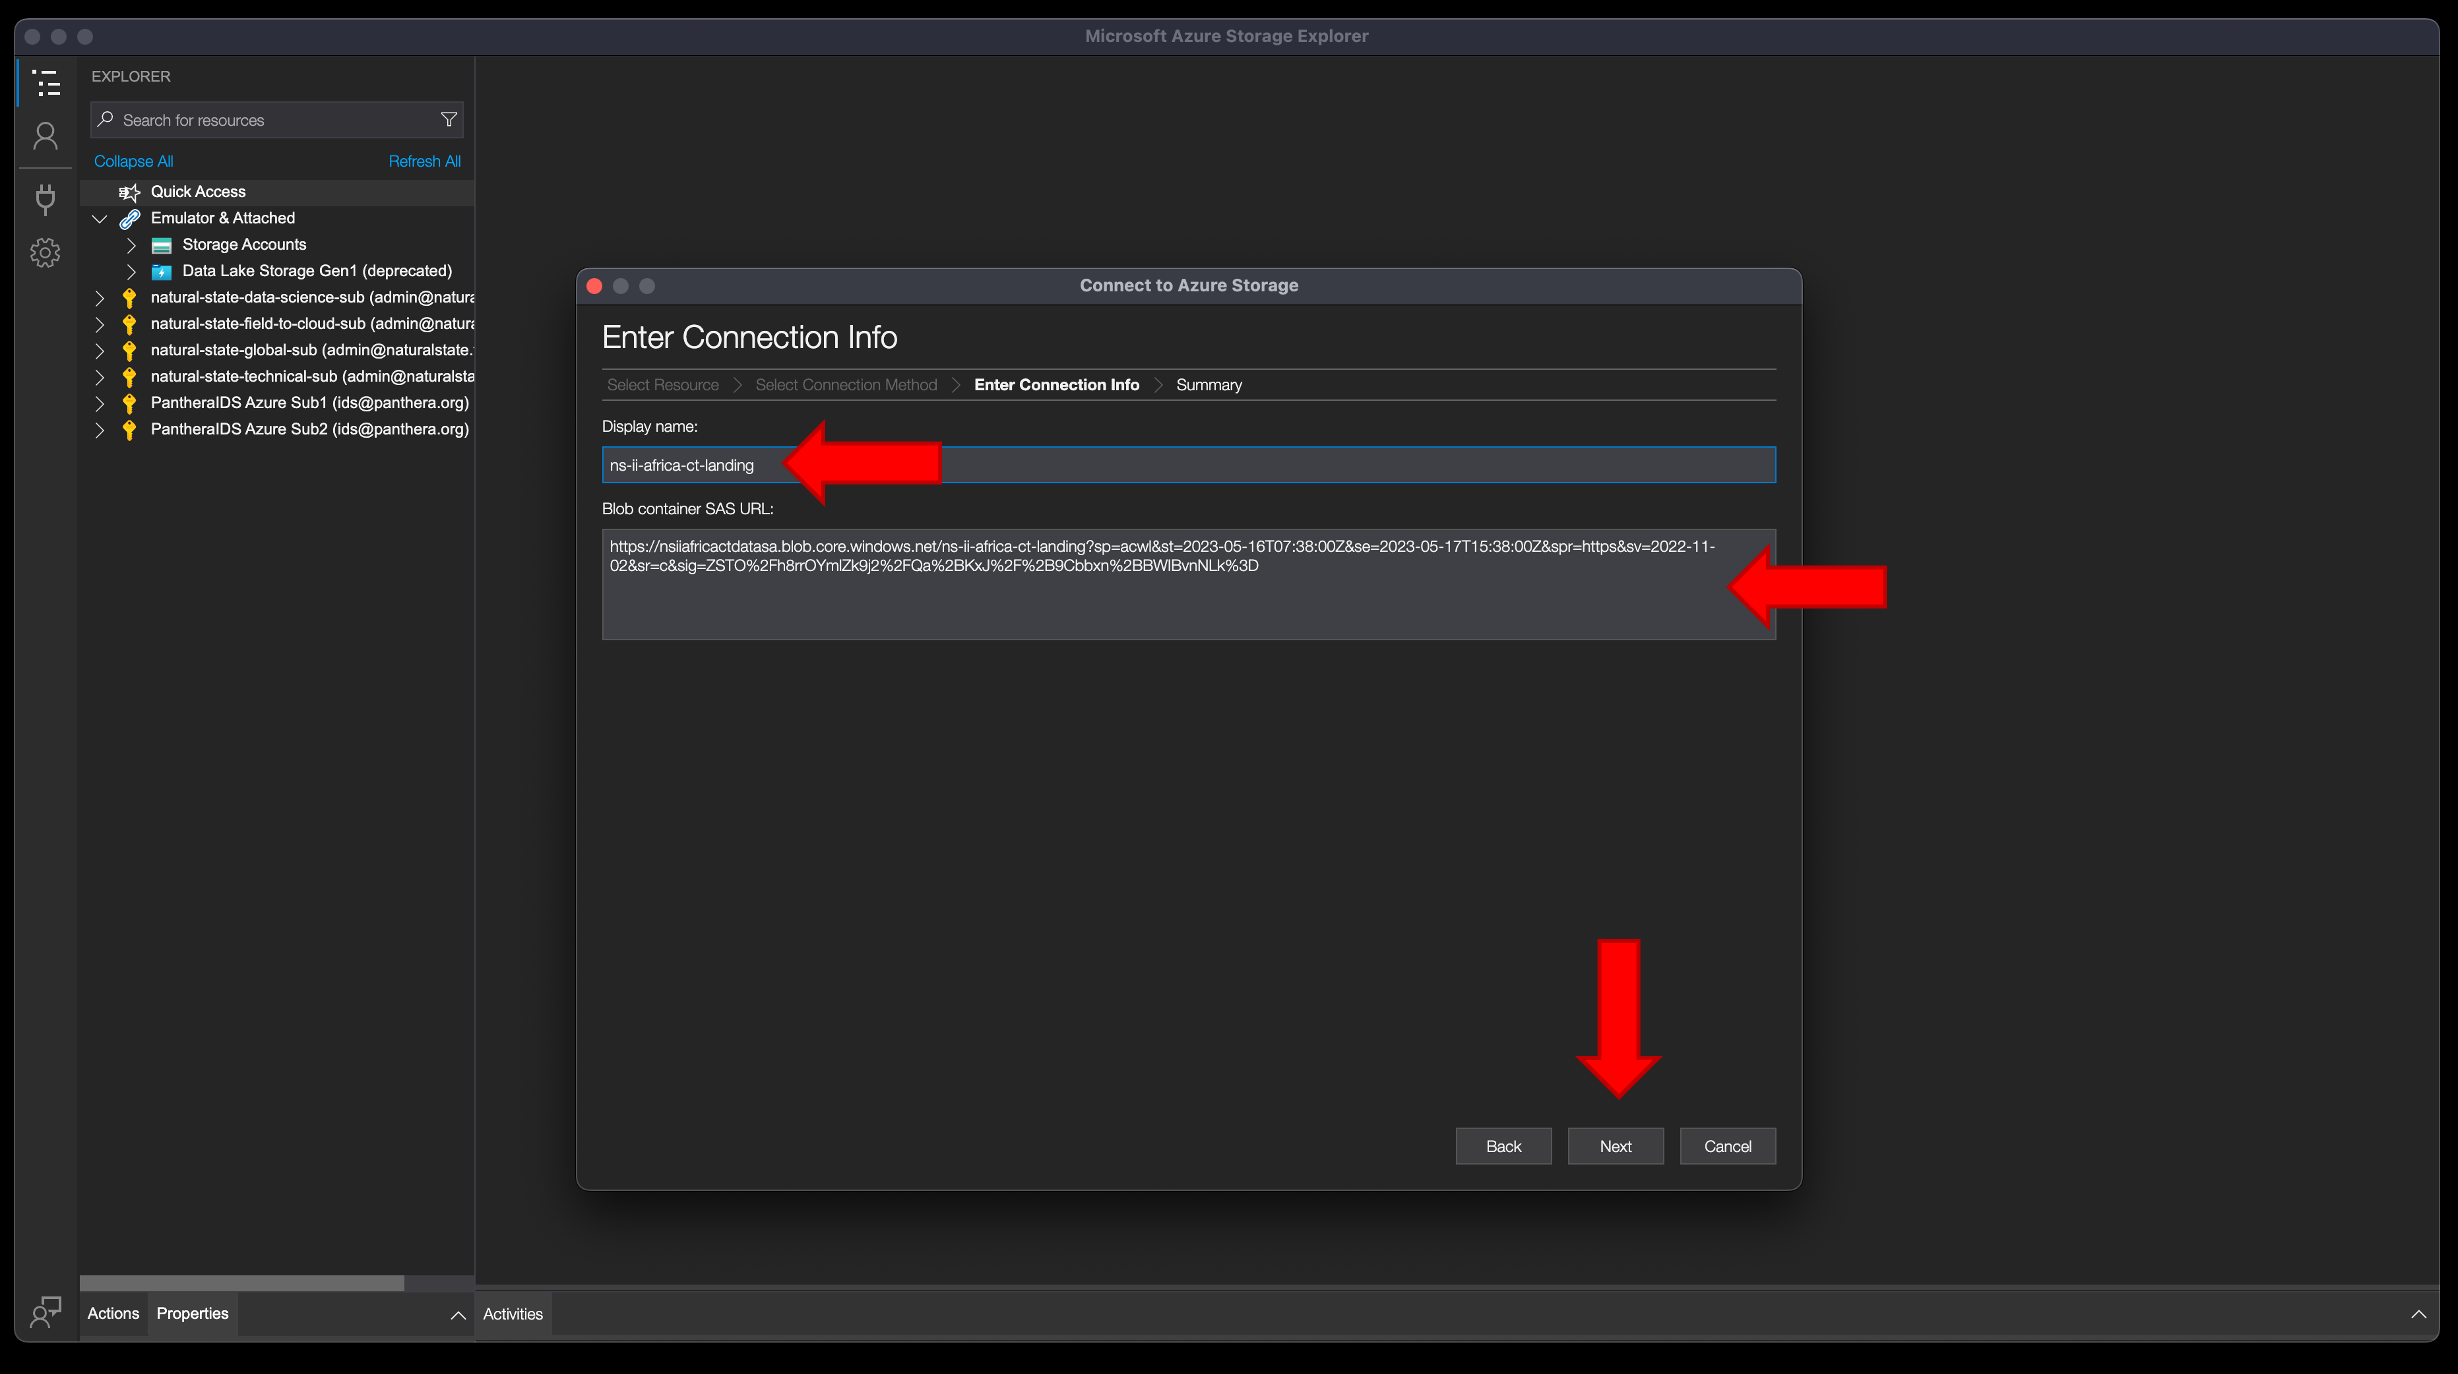
Step 11 – click “connect”
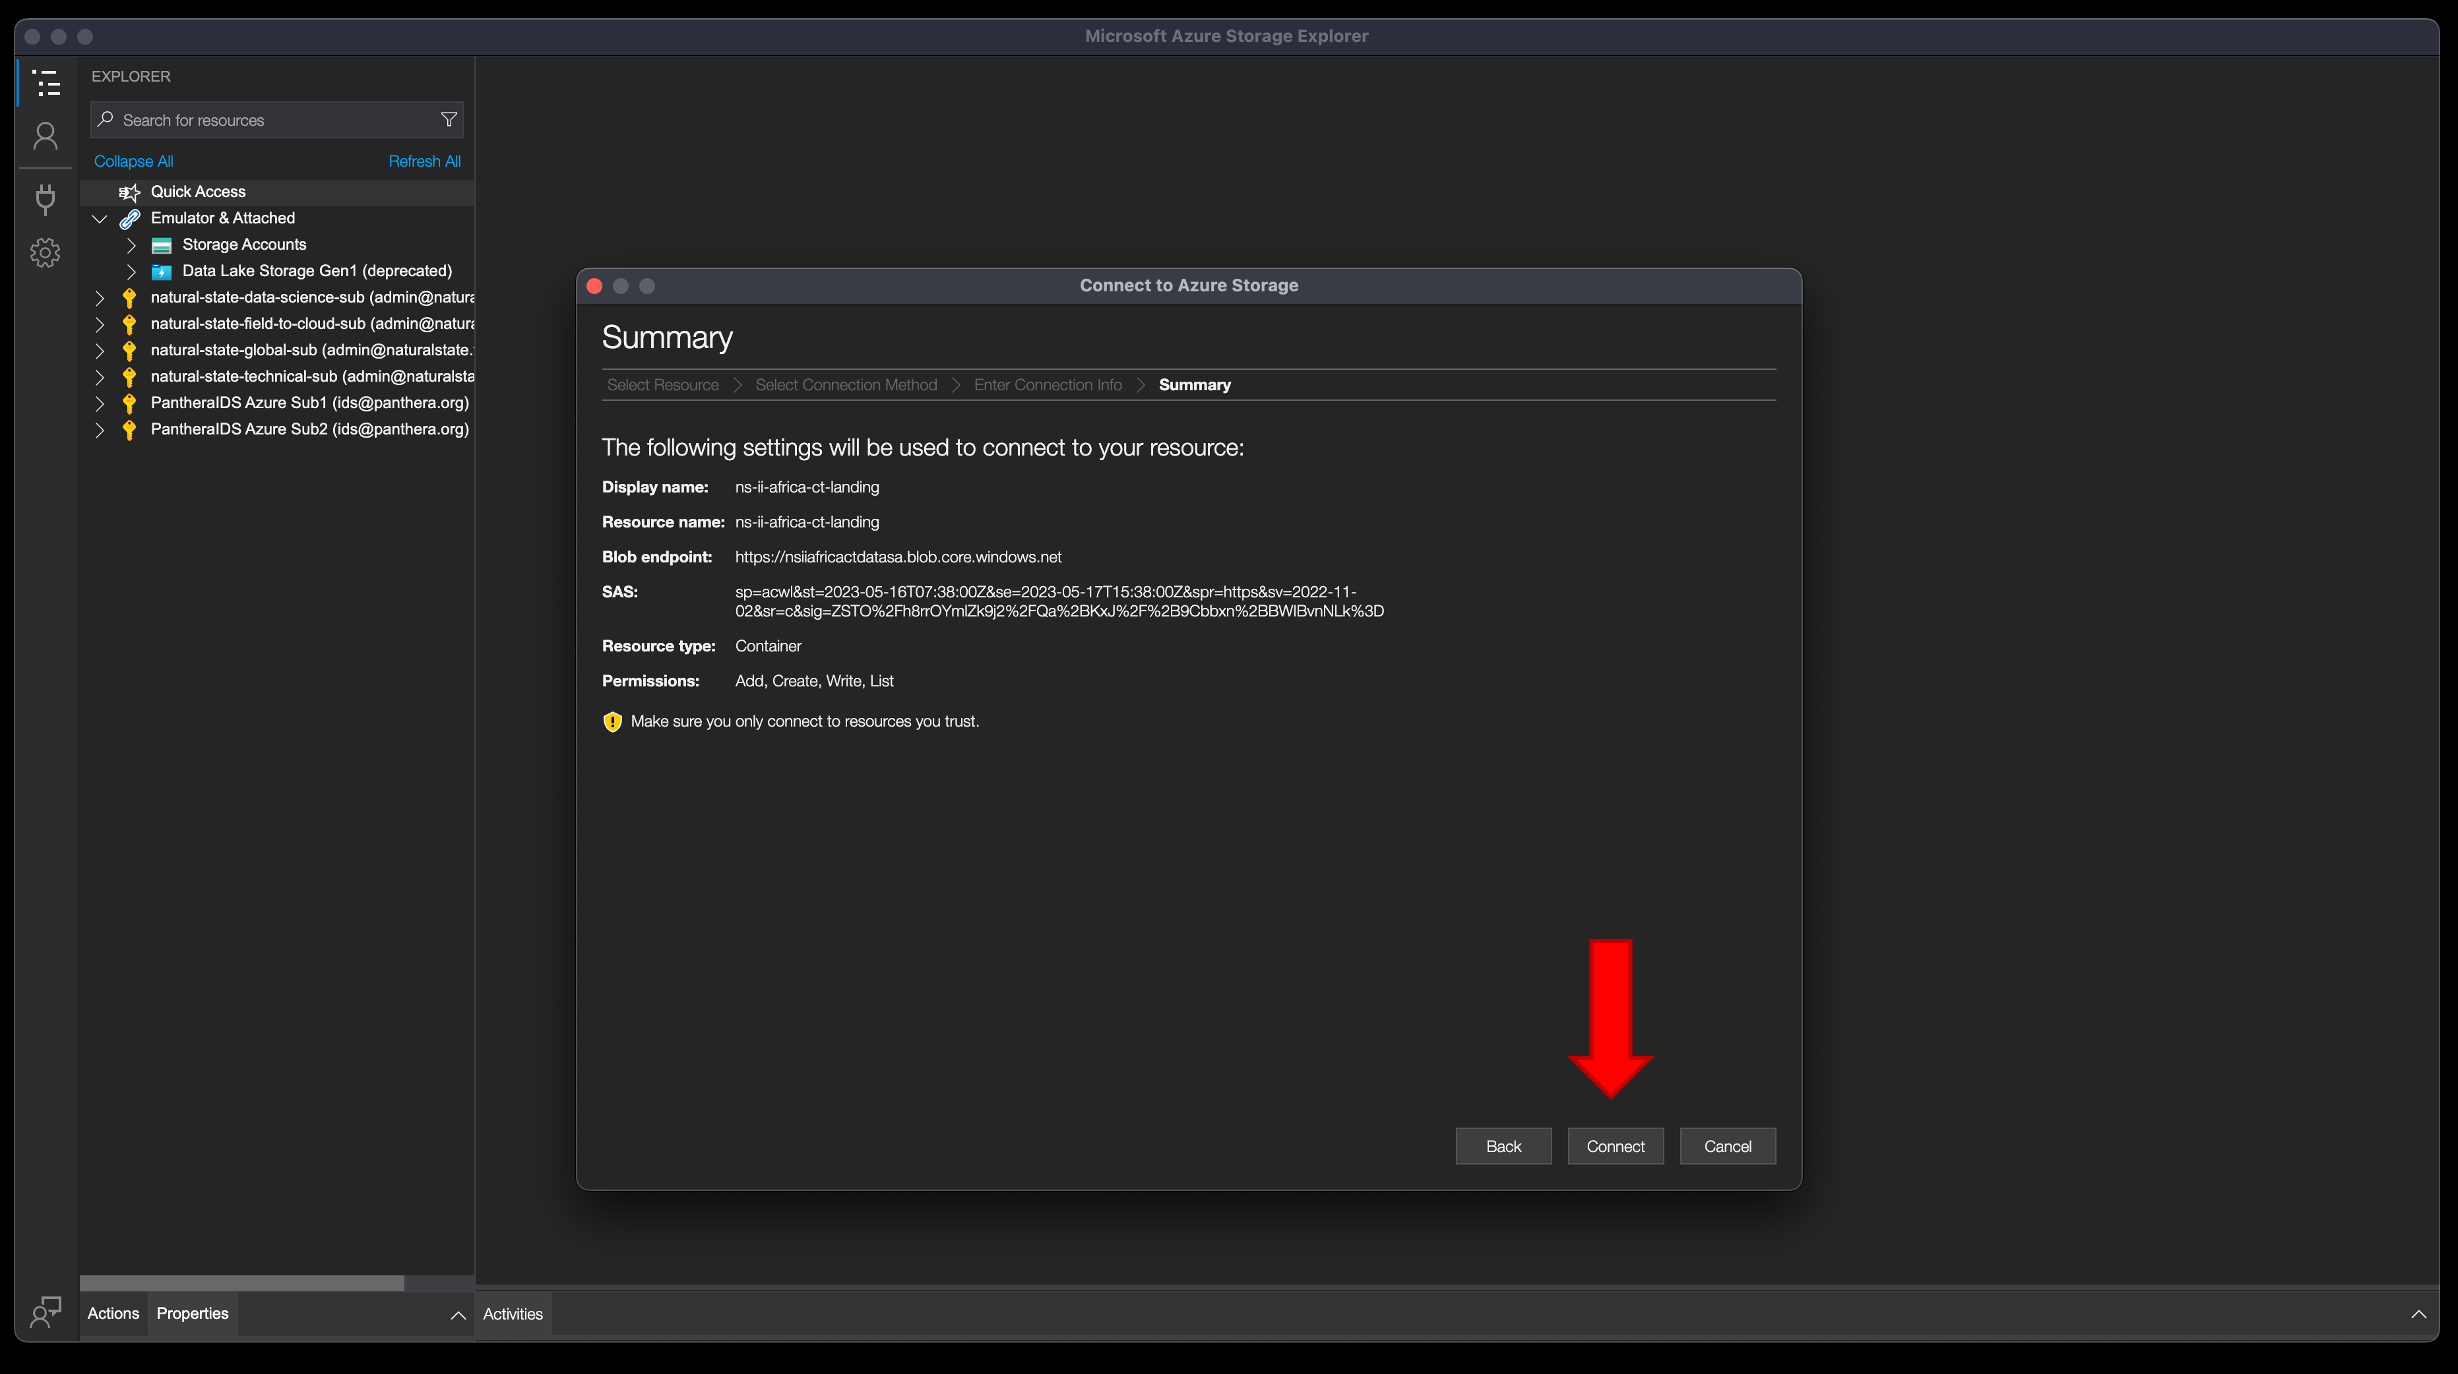
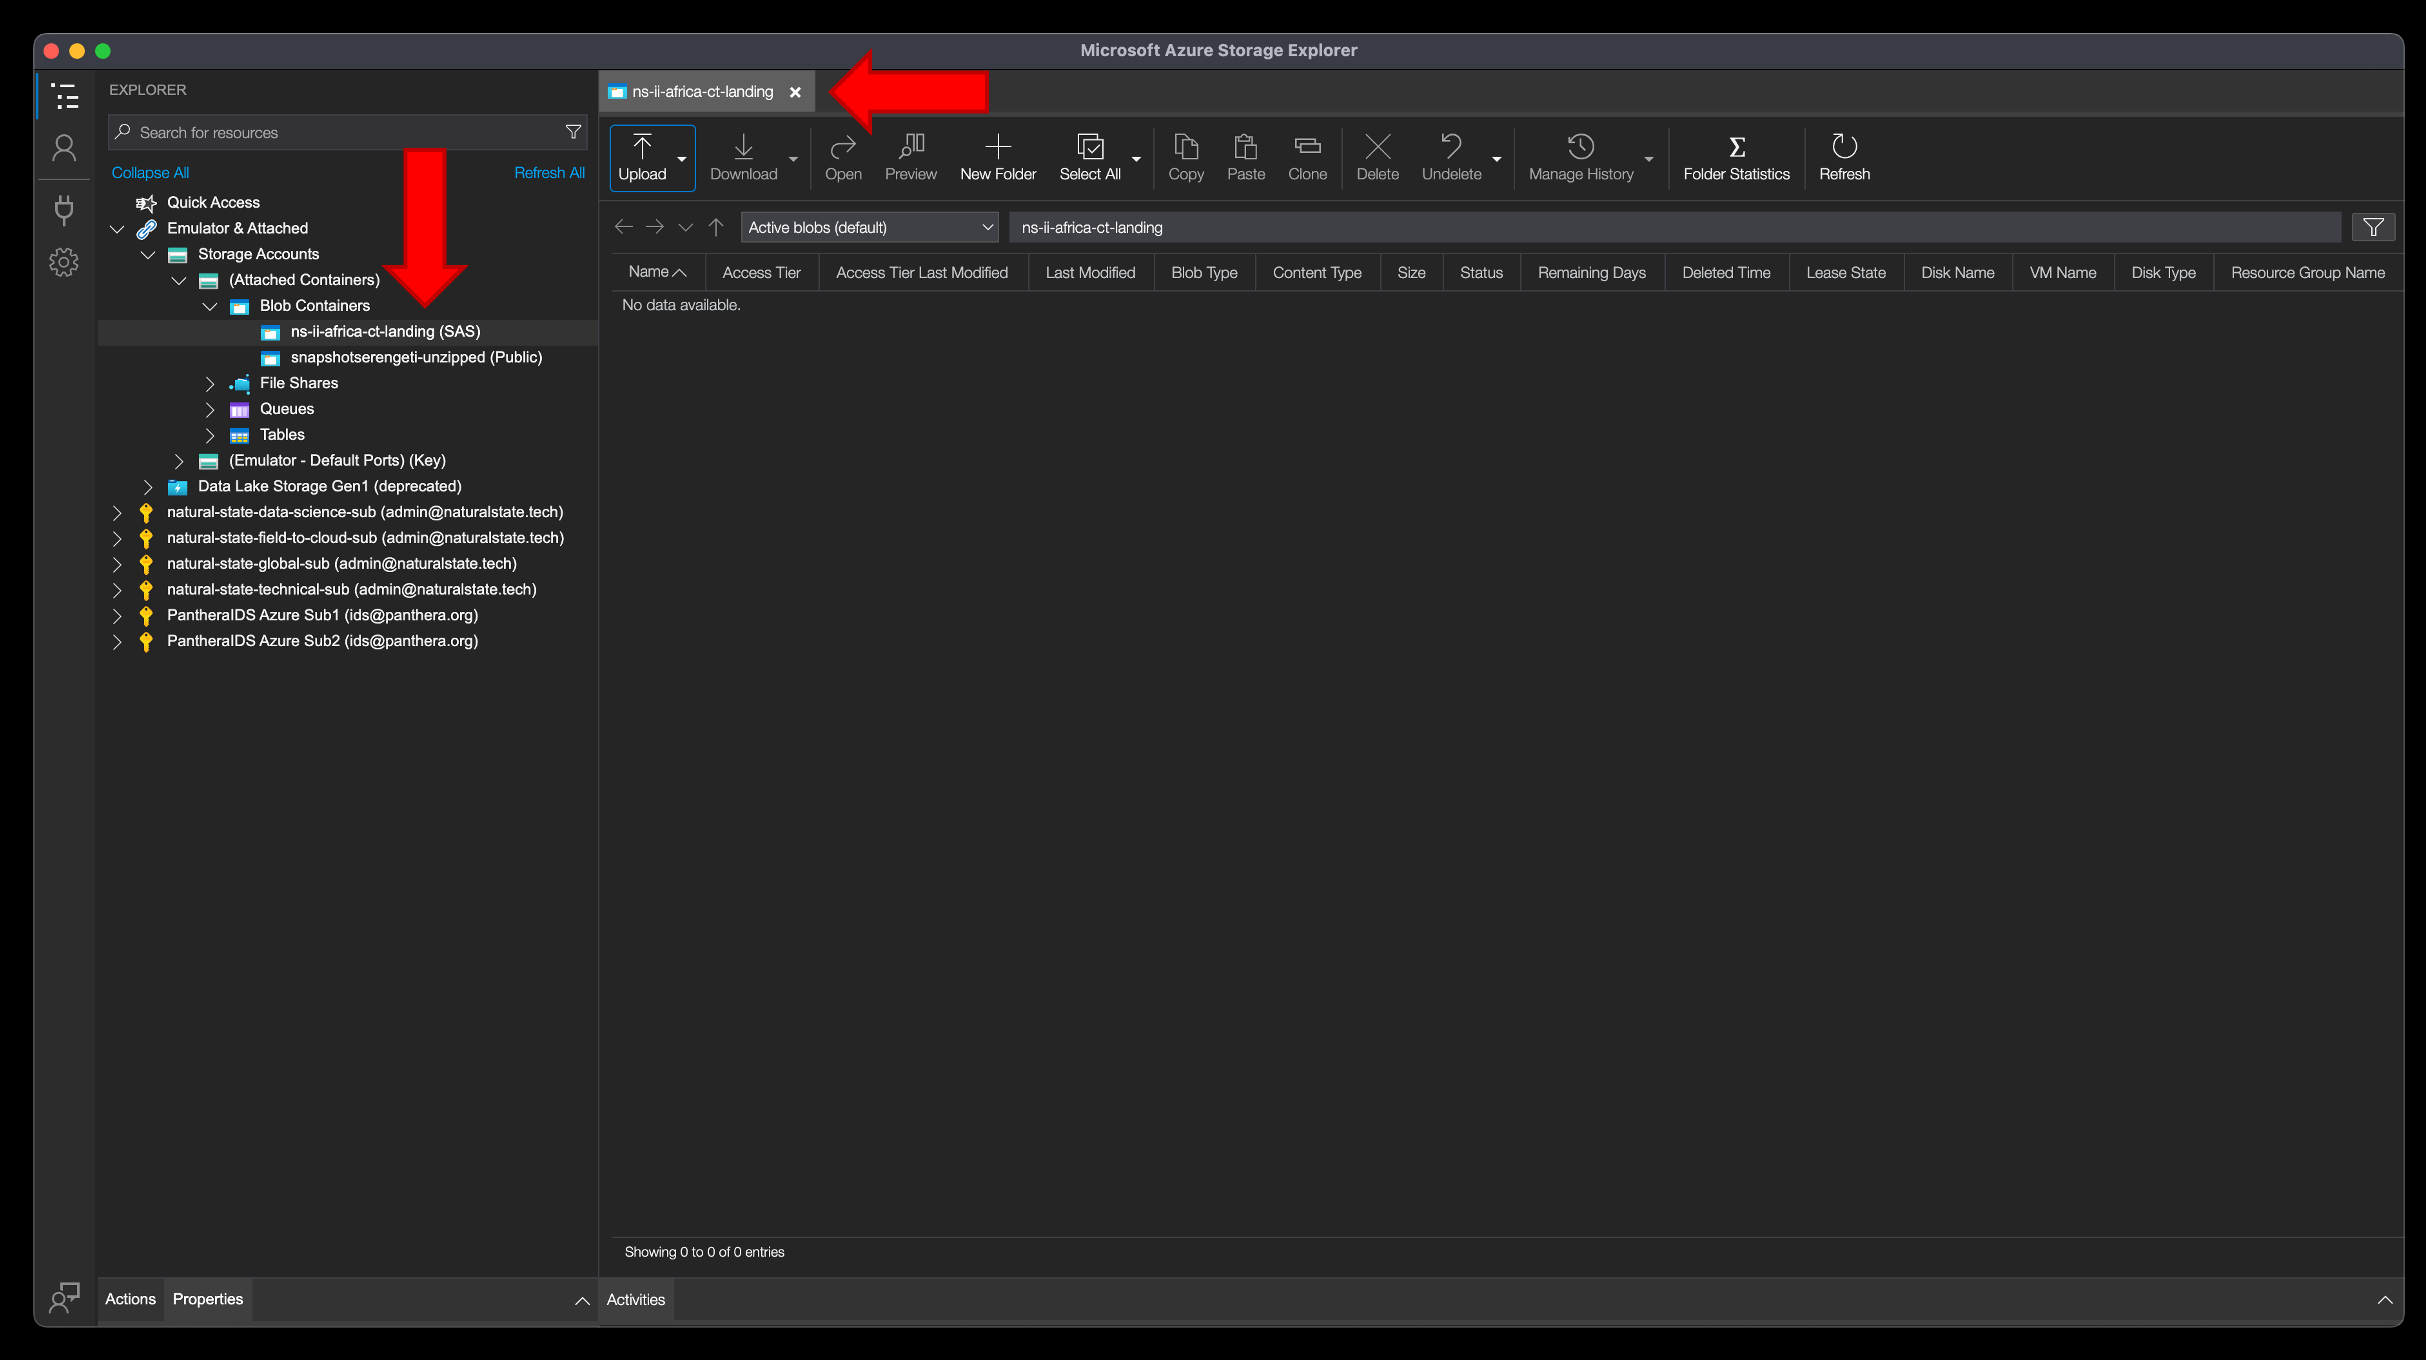
Step 12 – in the explorer pane (left sidebar), under “blob containers”, you should see your blob connection. Step 13 – click your connection. Step 14 – your container will open. It may, or may not, be empty.
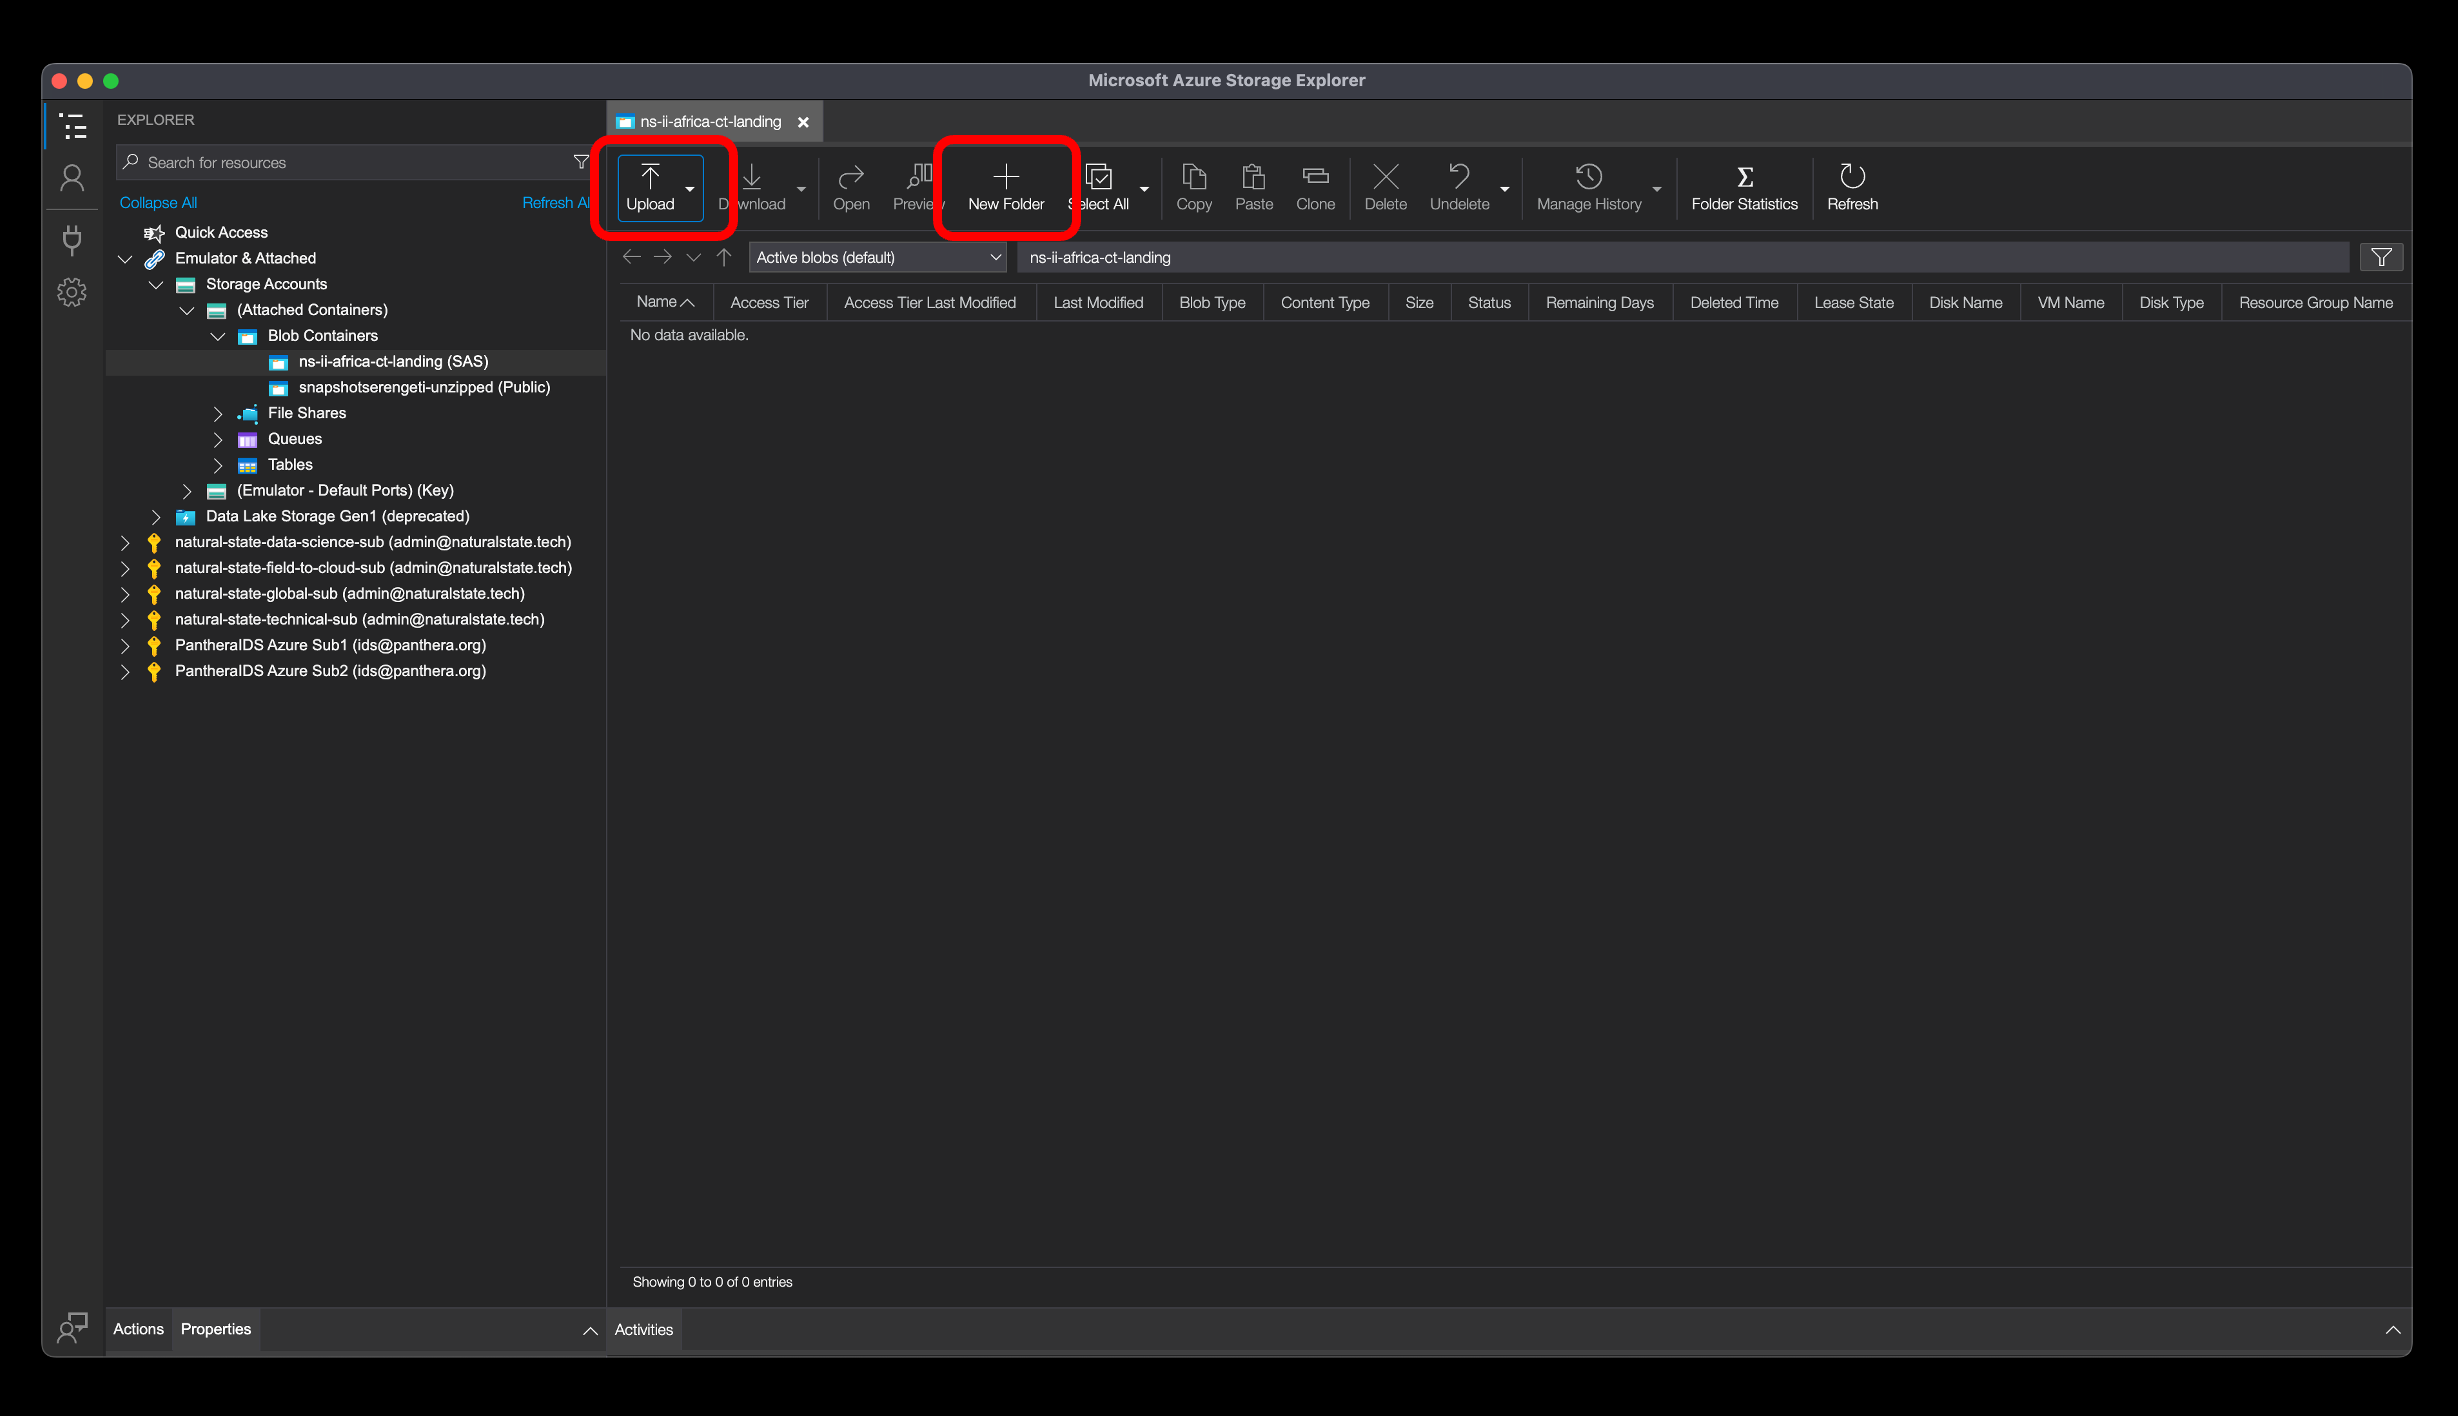
Step 15 – once navigated into the container, click “new folder”. Step 16 – create a folder with your initials and surname (e.G., Rtpitman). Step 17 – enter the folder you just created and click the “upload” button.
Step 18 – click the “…” to browse to the folder on your local computer.
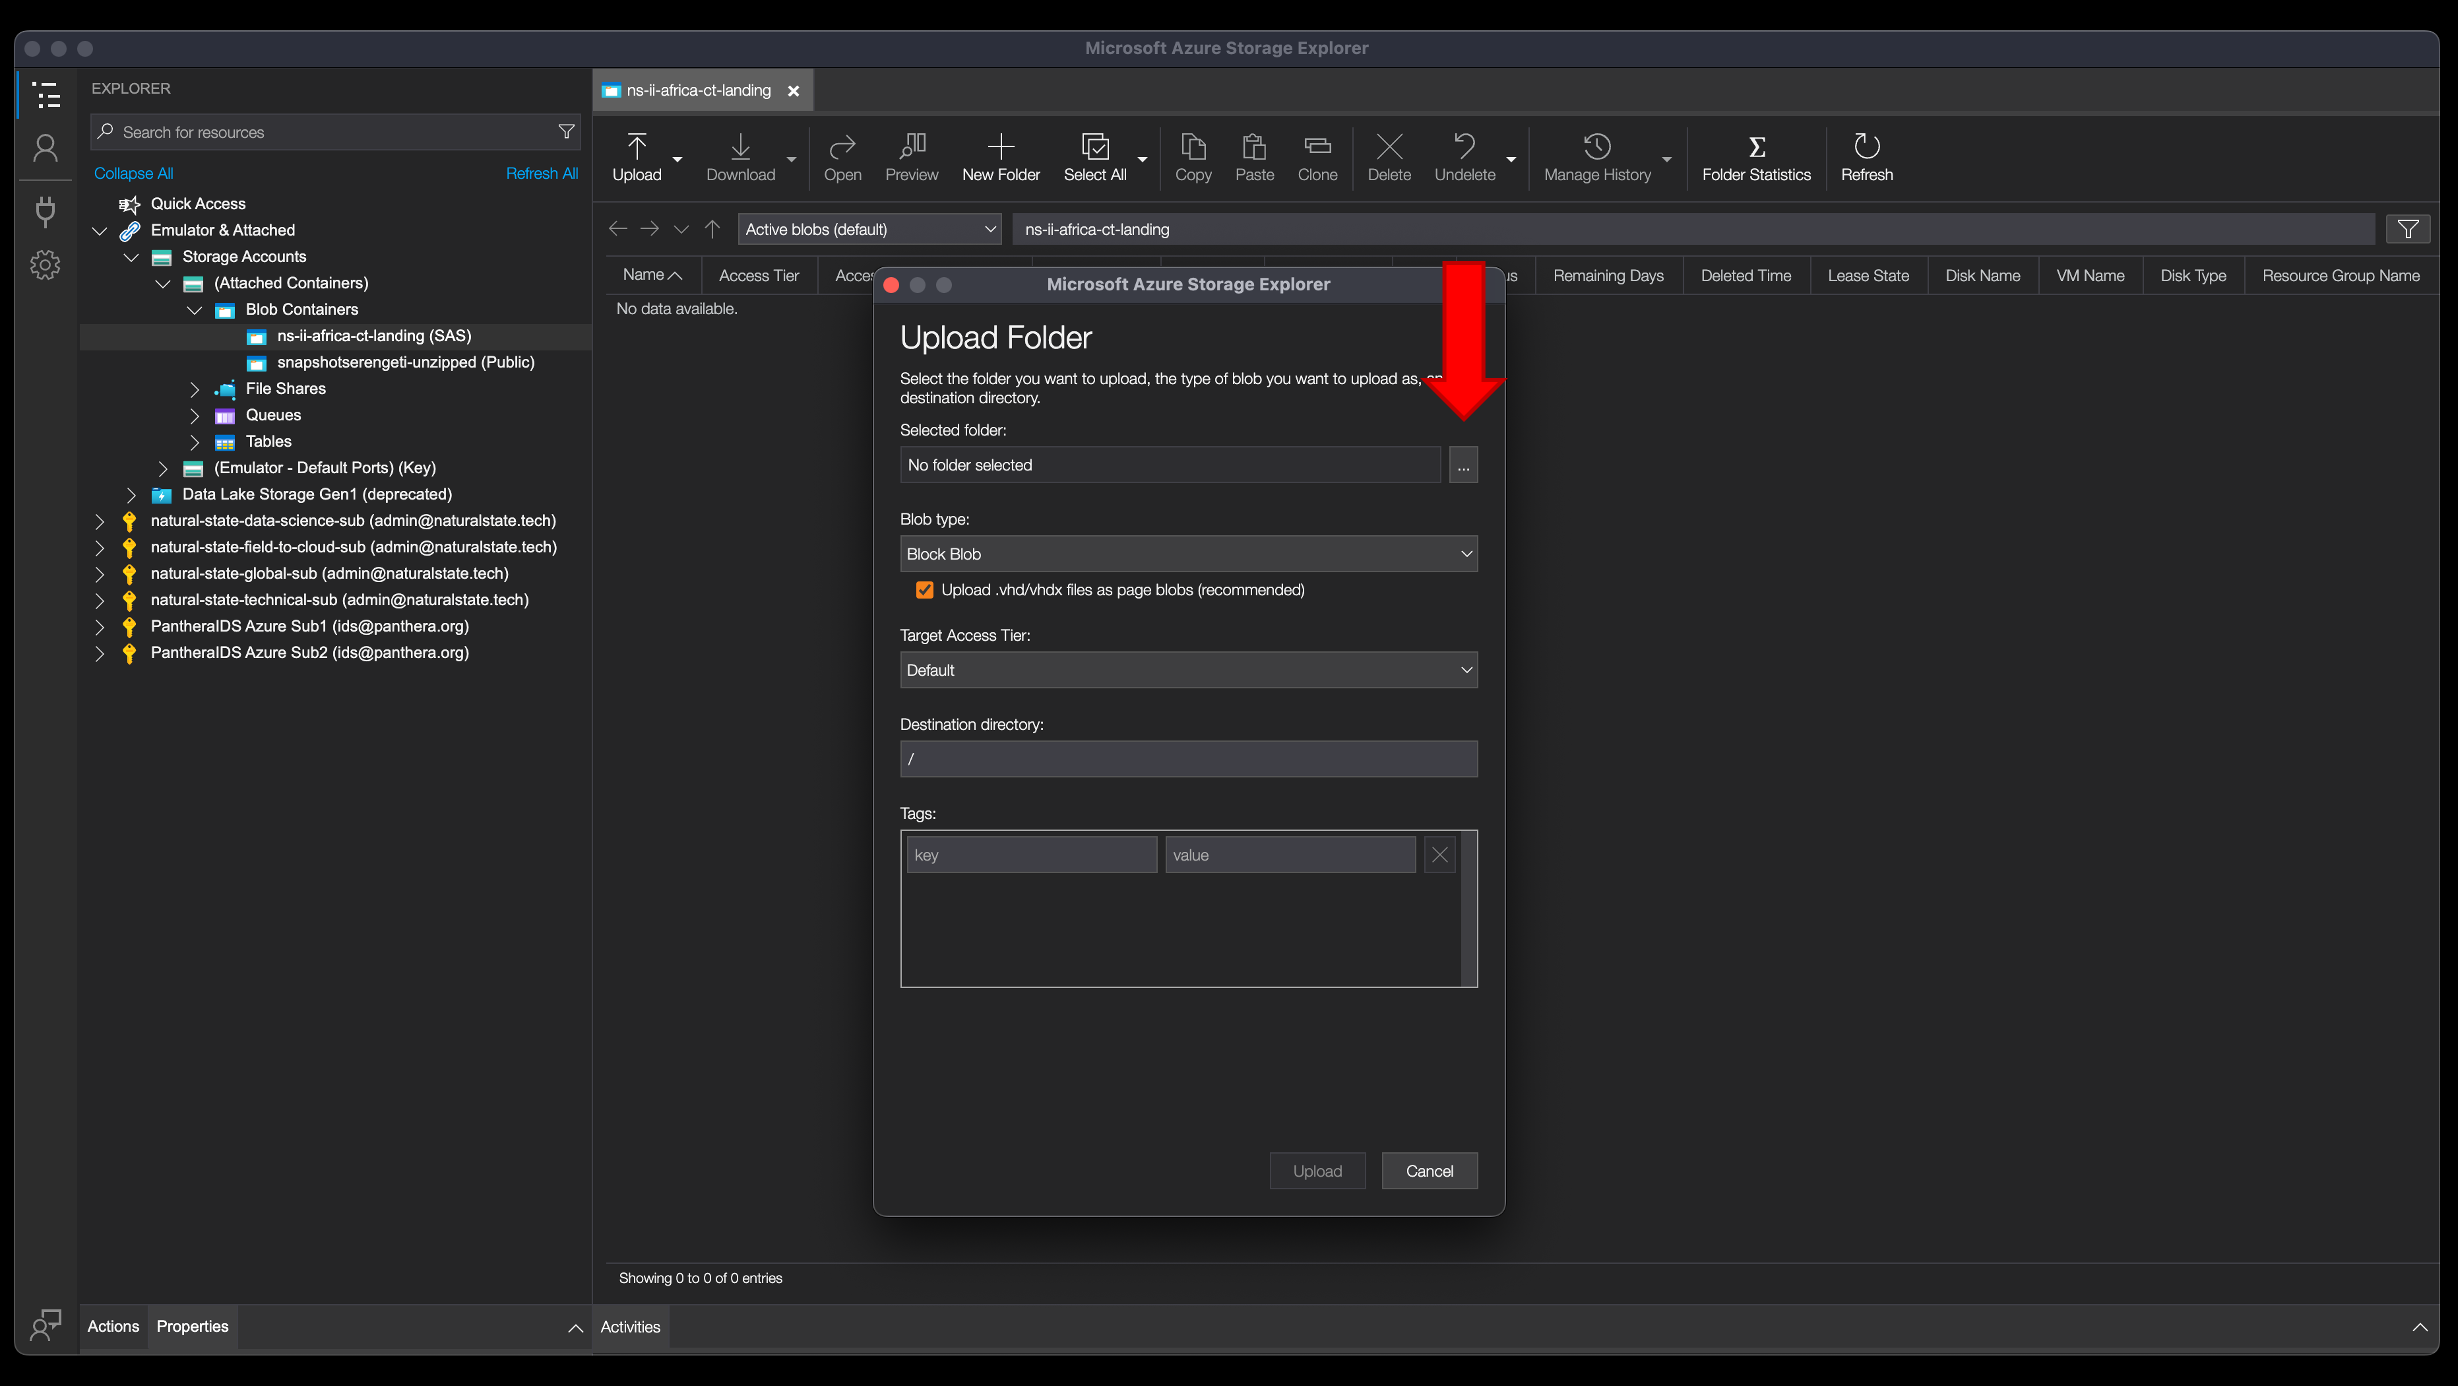
Step 19 – highlight the folder to upload, then click “open” or “select” (depending on operation system)
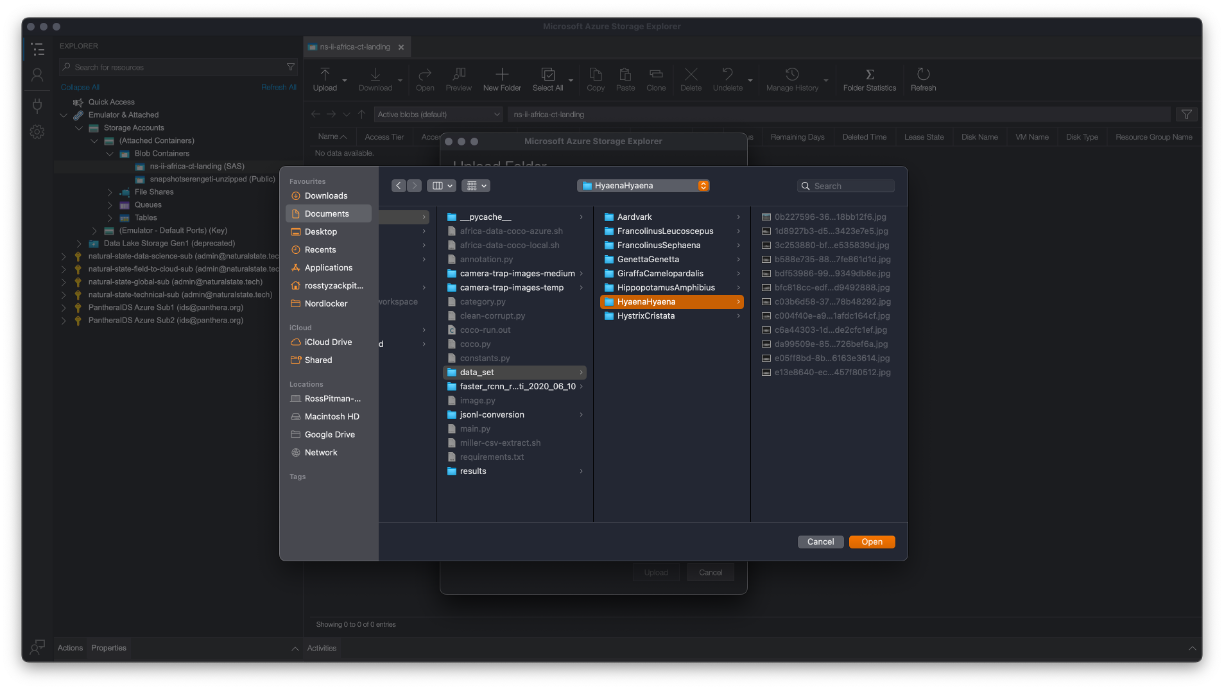
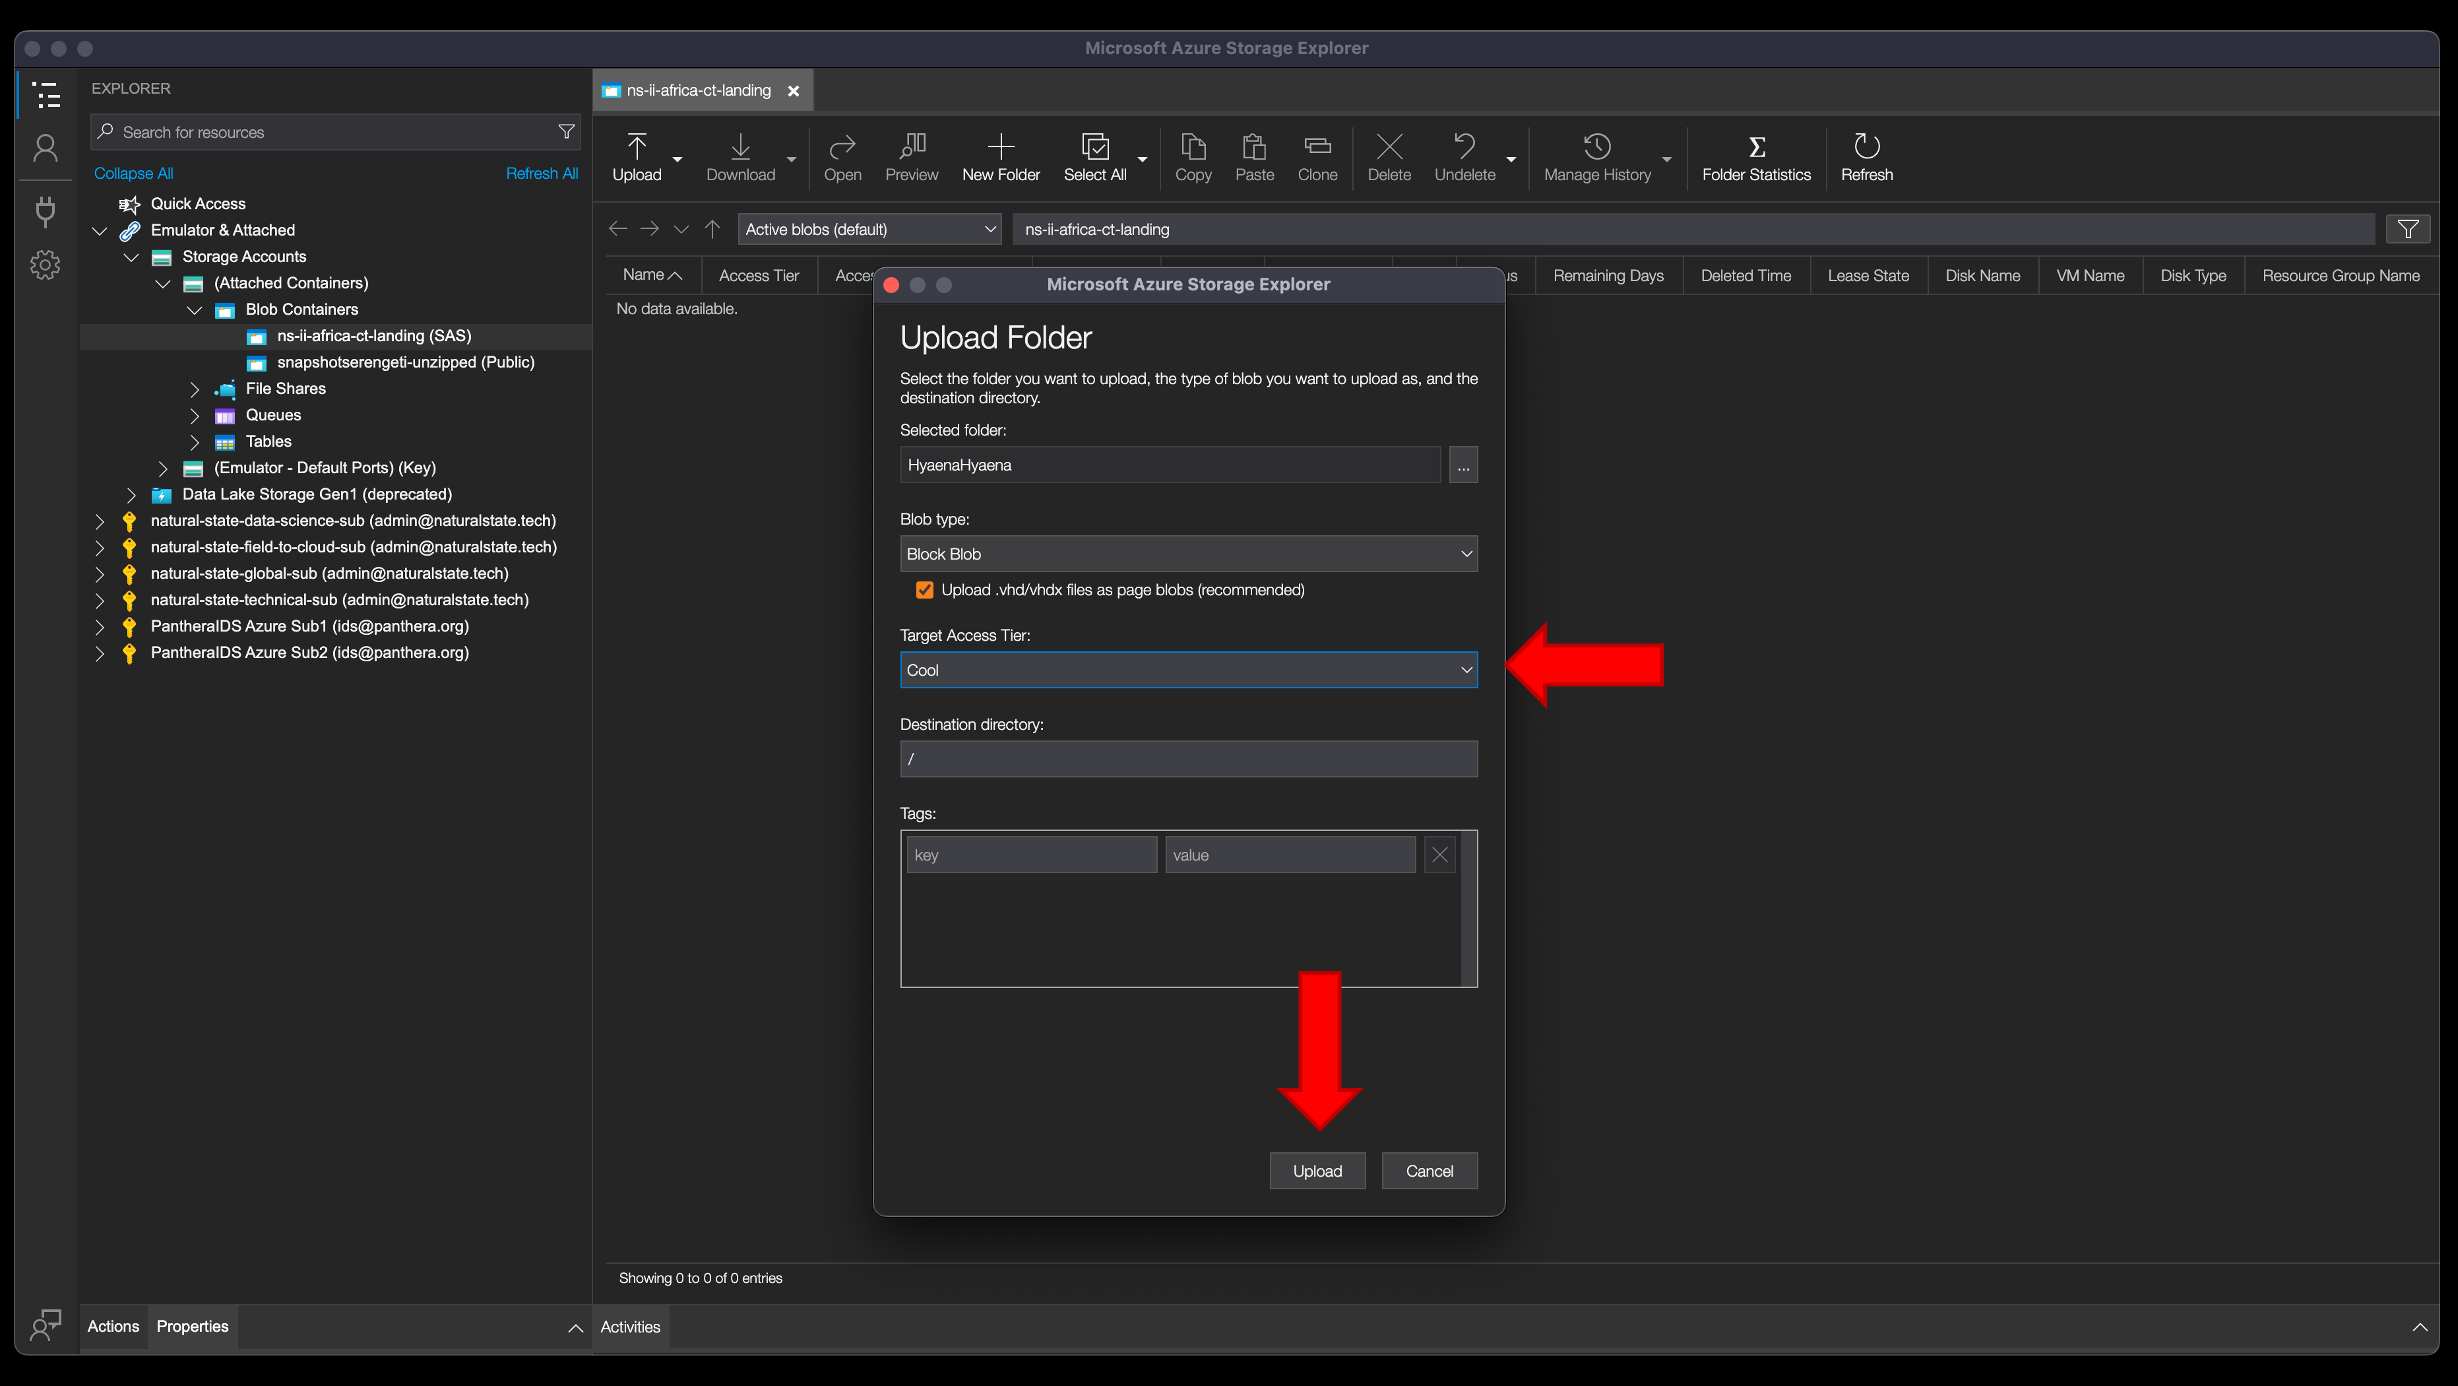
Step 20 – please change the target access tier to “cool”. Step 21 – click the “upload” button.
Step 22 – let the upload complete (this may take many hours). You can track progress by looking that the activities tab (bottom of the screen)

Step 23 – once finished, right-click on the connection, and “detach”.
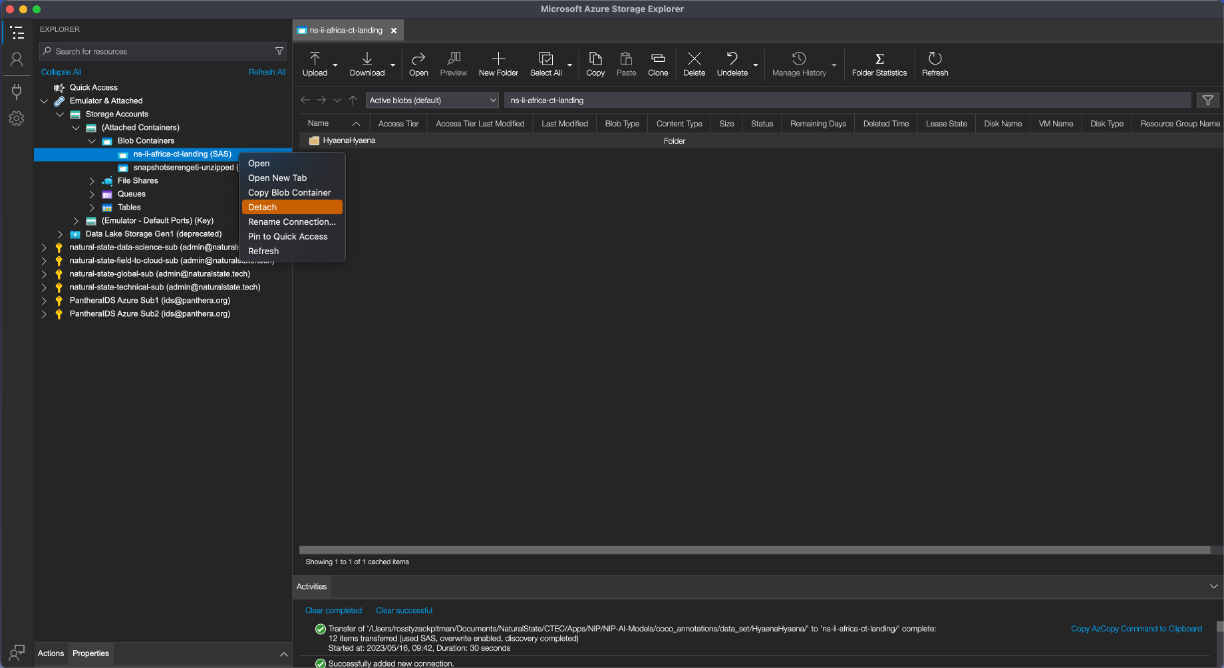
Step 24 – click “yes”, and exit storage explorer.

Raw Sensor Data Egress
Follow the same step for data ingress (up to step 14).
Step 1 – in the explorer pane (left sidebar), under “blob containers”, you should see your blob connection. Step 2 – click your connection. Step 3 – your container will open, in this case, a container called “lidarlbc”.
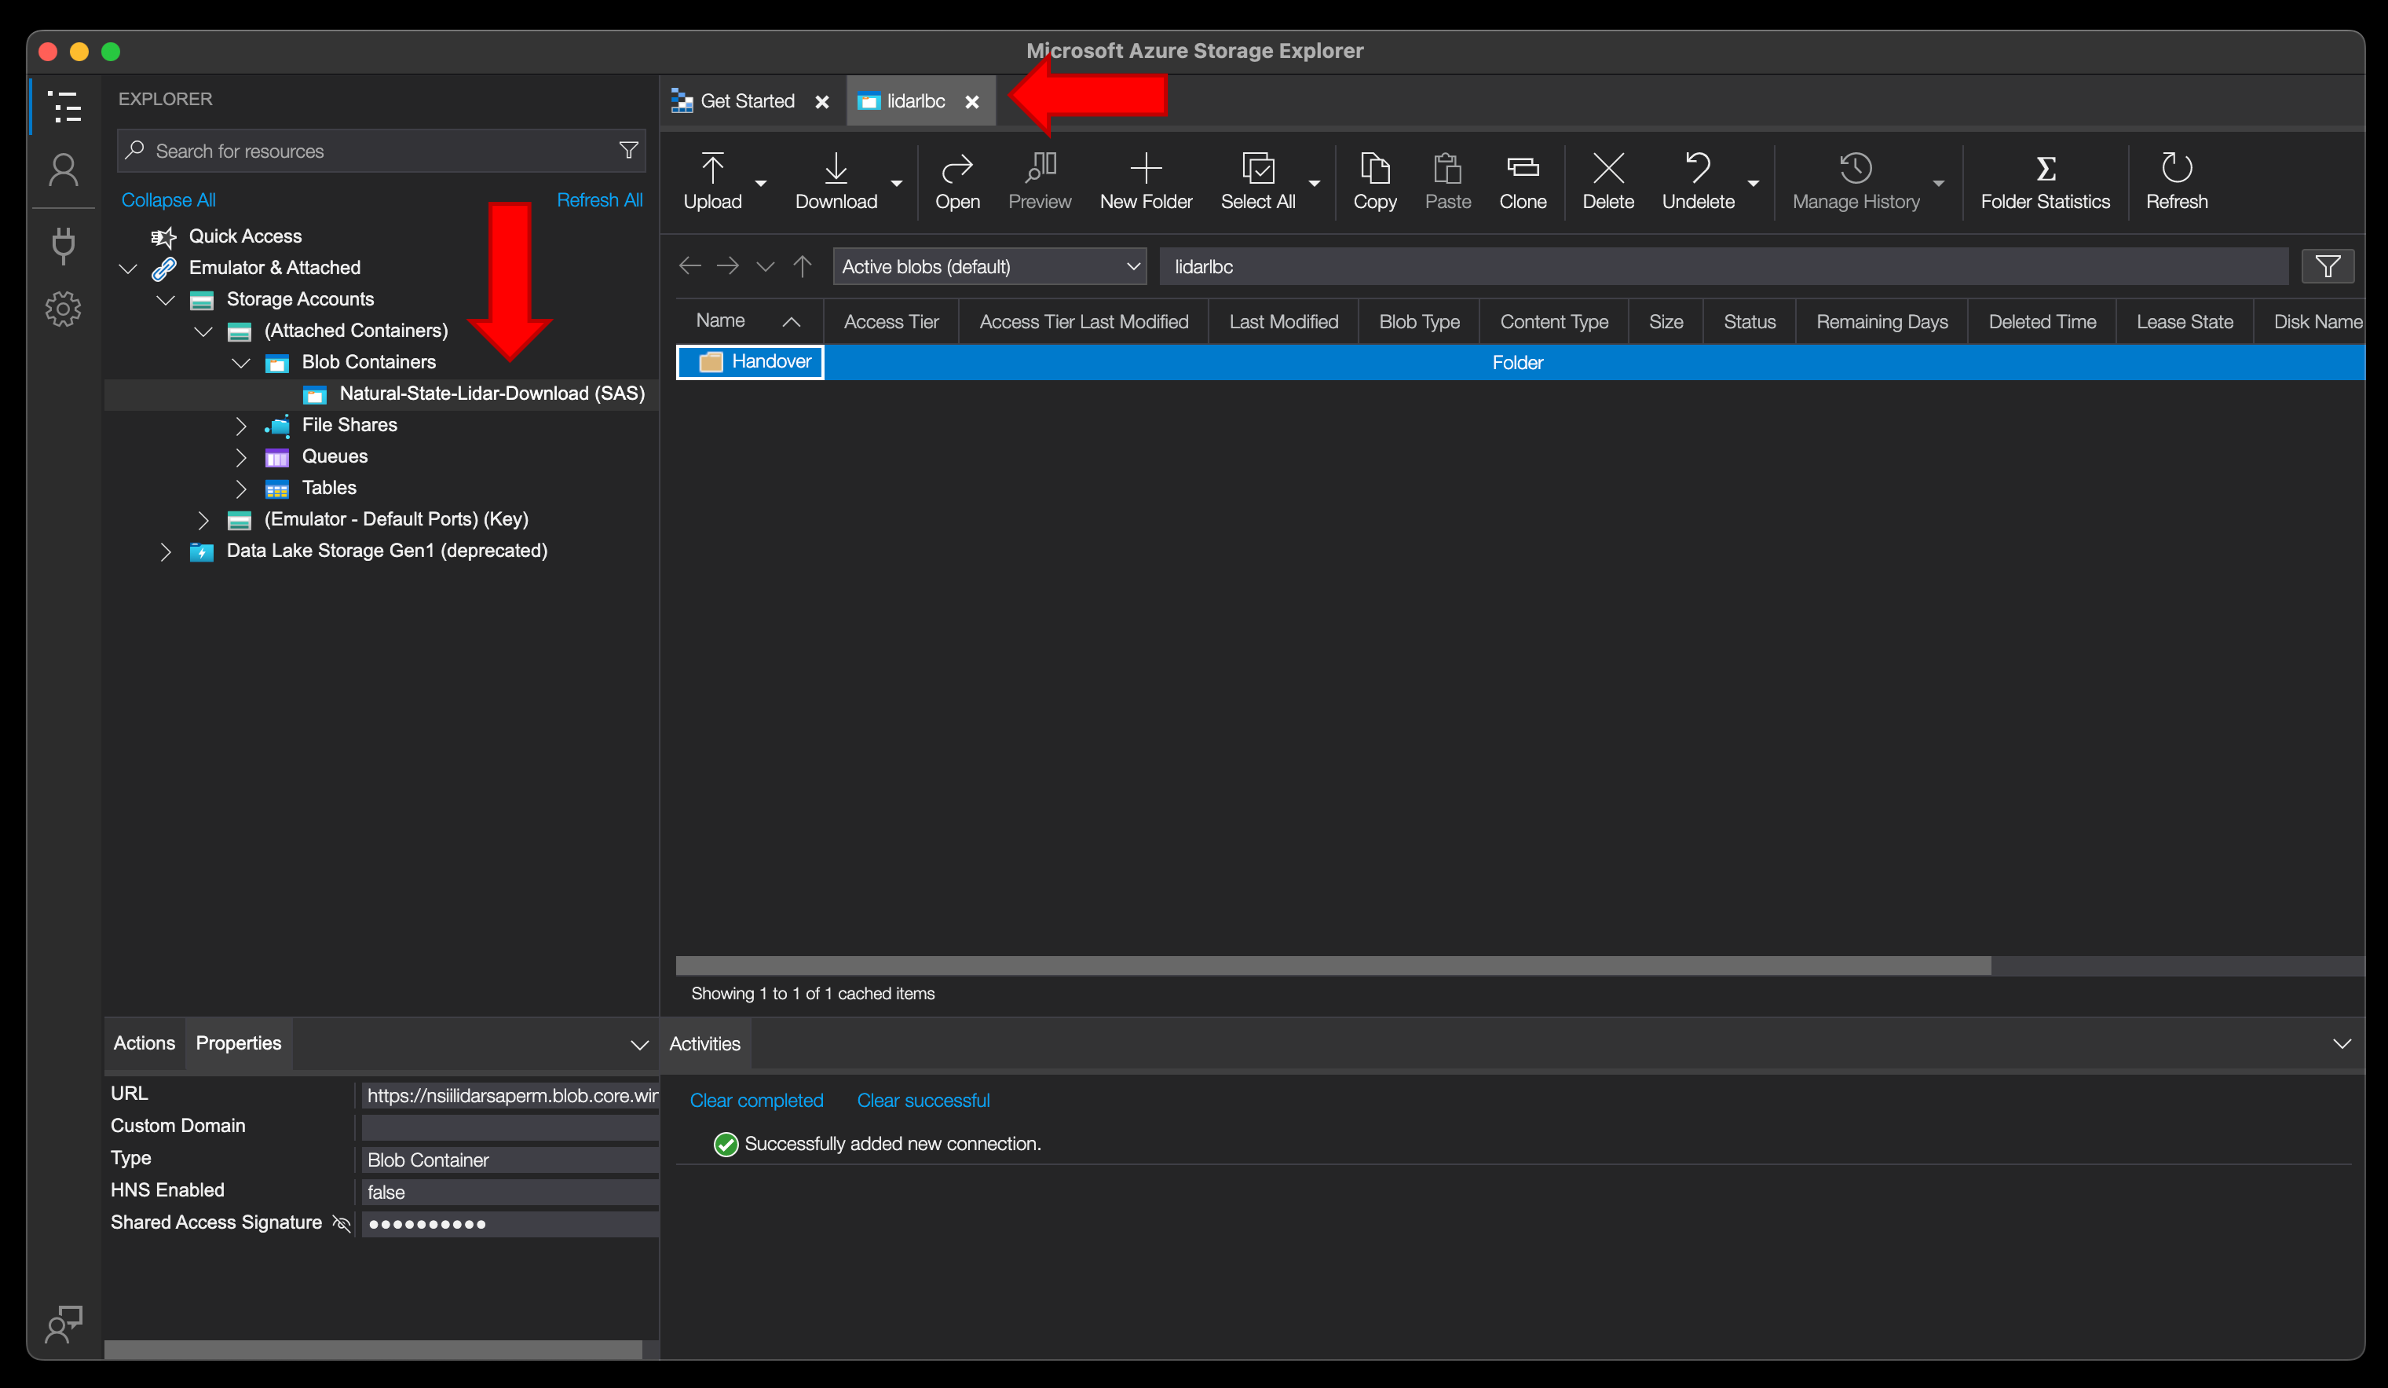
Step 4 – navigate into the container … libarlbc > handover > utm37n_wgs84 > imagery Step 5 – highlight the folder you want to download, “imagery” in this case. Step 6 – click the “download” button.

Step 7 – select your download location Step 8 – click “open” or “select” (depending on operation system)
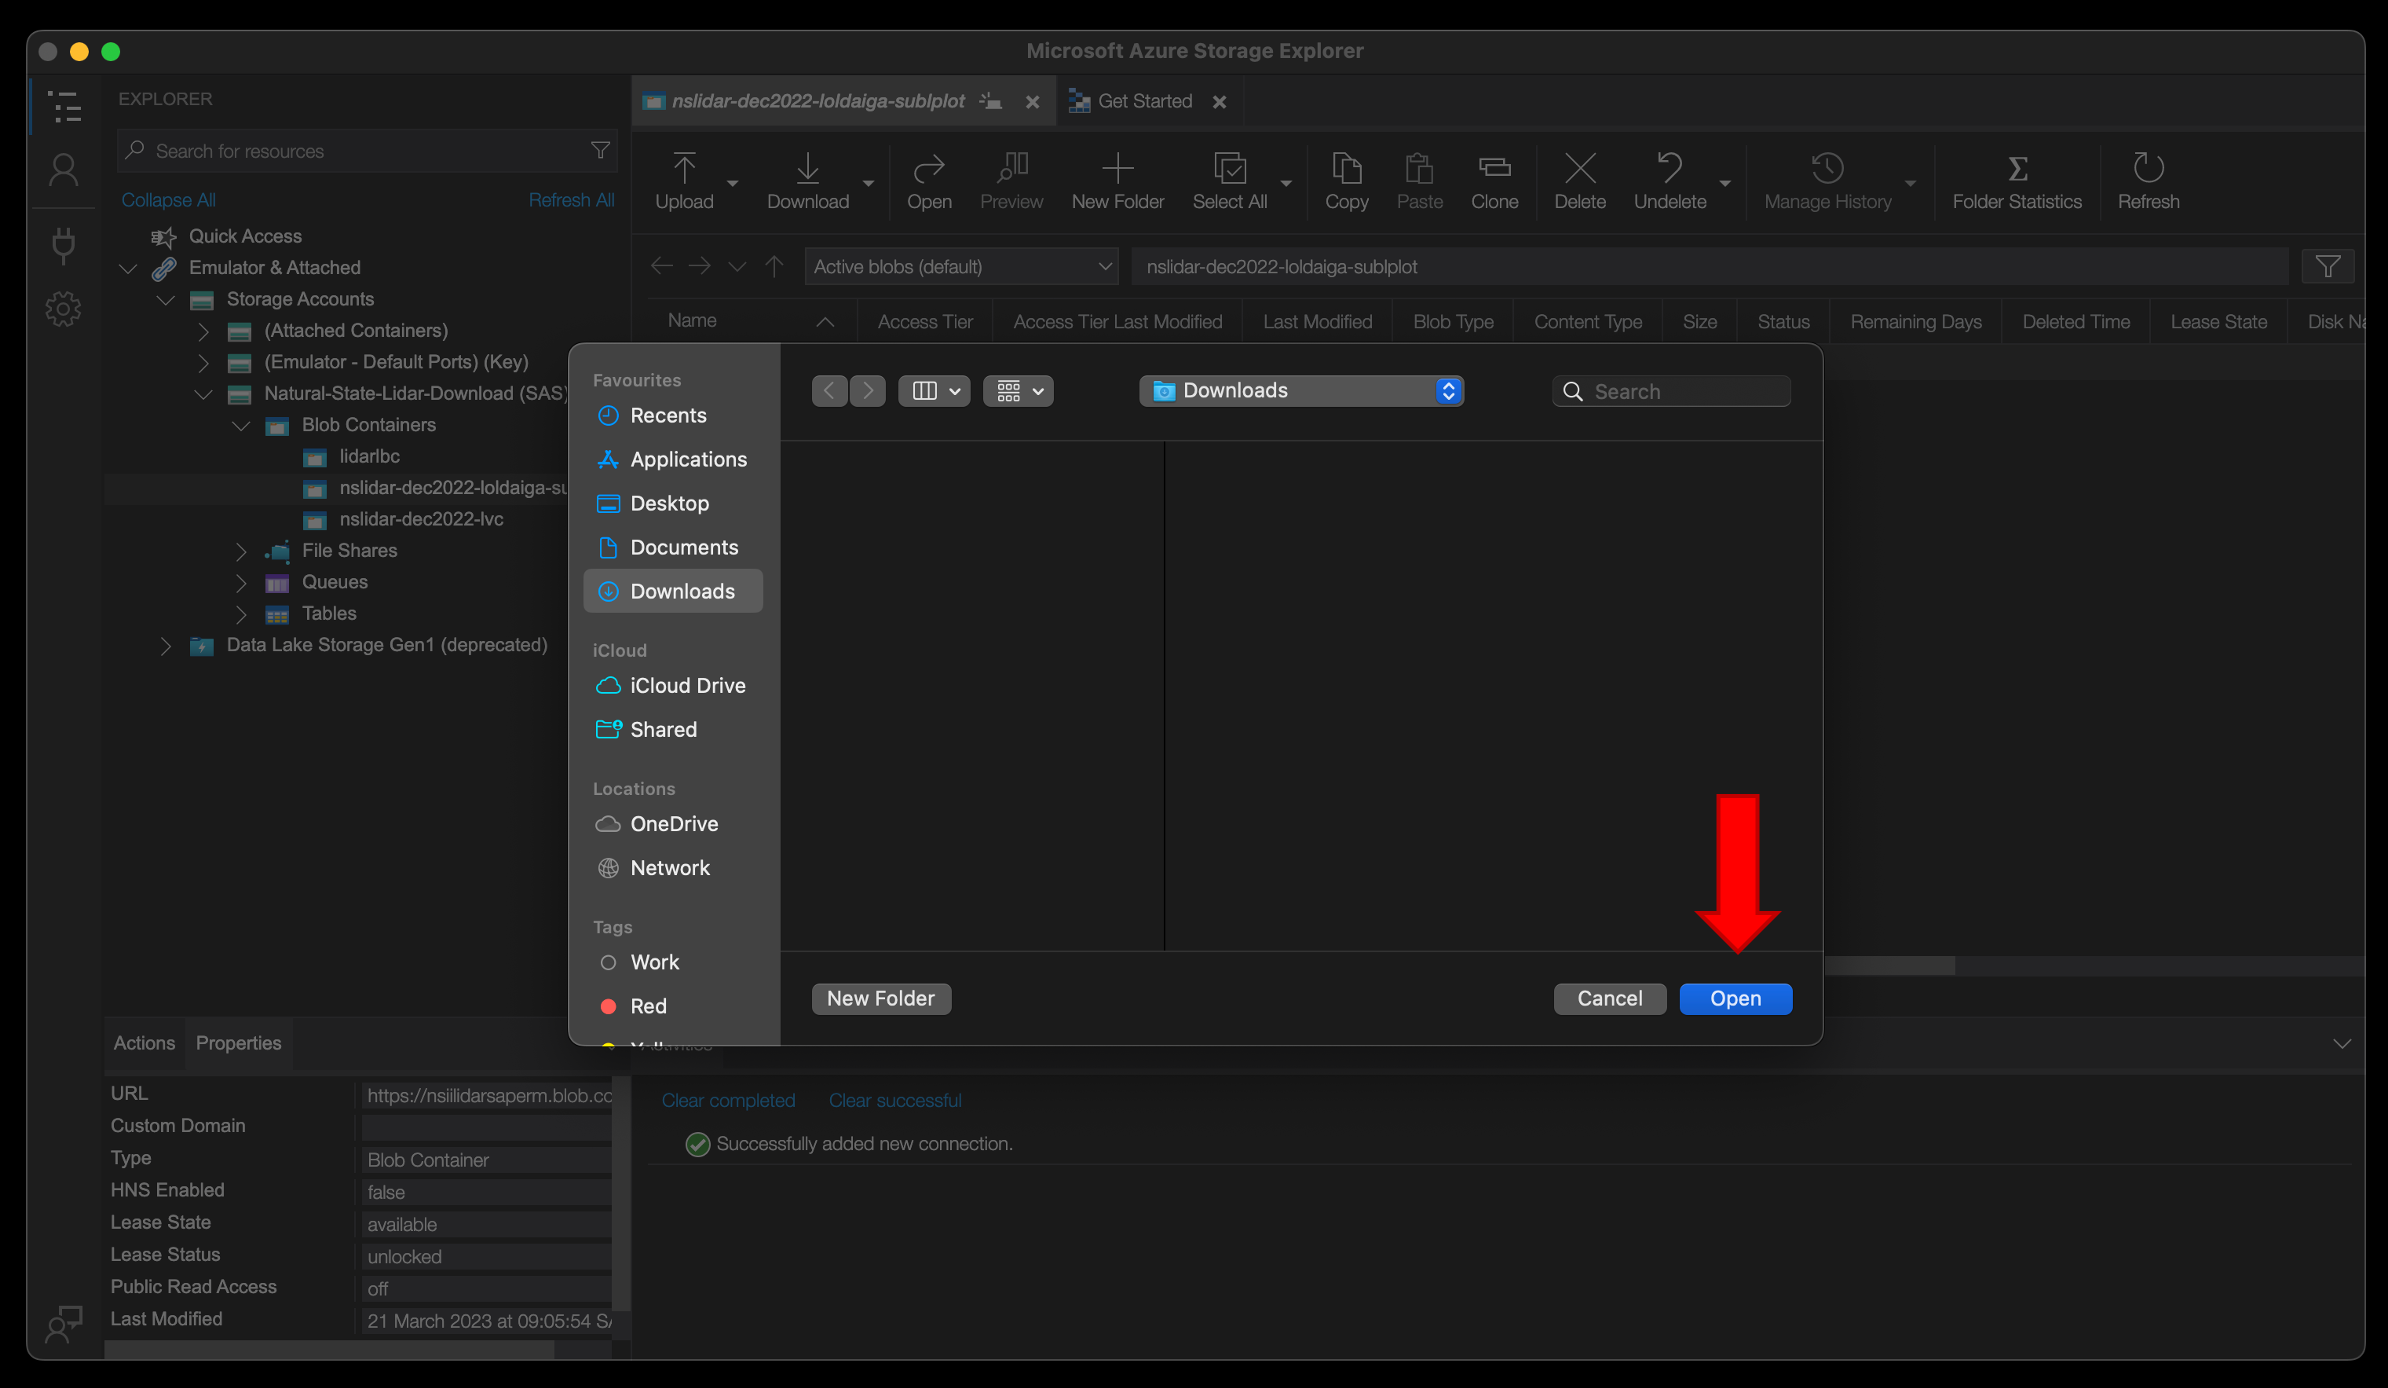
Step 9 – let the upload complete (this may take many hours). You can track progress by looking that the activities tab (bottom of the screen)

Step 10 – once finished, right-click on the connection, and “detach”.

Step 11 – click “yes”, and exit storage explorer.
