
Standard Operating Procedures - Arid lands soil carbon monitoring
KEY DETAILS
- Principal Investigator
- Dr. Lucy Smyth
Date - 19 May 2025
Version - 1.0.4
Programme - Arid Biodiversity Programme
Key partners - ORKCA Contact email
- lsmyth@naturalstate.org
1. PREAMBLE
Natural State’s research methods and activities are detailed by a set of accepted Standard Operating Procedures (SOPs). These documents describe the steps involved in all Natural State research methodologies, from data collection to data processing and storage. Each SOP documents key methodological details for a specific data type. The objectives and background of the projects or surveys these methods are used for, features of the study area where these methods are applied, and details on survey and sampling designs for these methods may be found in survey Design Documents (DDs), which are available in the Related Documents section below or may be perused in the main NS Design Documents documentation page.
2. GLOSSARY
3. METHODS OVERVIEW
The arid lands carbon monitoring protocol is used to soil carbon across the landscape so that spatial and temporal changes in soil carbon can be documented. Sampling requires collecting soil carbon and bulk density samples separately.
3.1 METHOD AIMS
The arid lands carbon monitoring methods are designed to:
- Document soil carbon stocks across the landscape.
- Investigate the proportion of labile versus mineral associated soil carbon across the landscape.
3.2 METHODOLOGICAL BACKGROUND
These methods for monitoring soil carbon in arid lands require the establishment 40 m X 40 m plots. In most cases these will be vegetation plots already established in the landscape. Each plot will be divided info four subplots, and soil carbon and bulk density sampling will take place in each subplot.
Soil carbon is calculated using two complementary methodologies:
- Bulk density sampling, which uses undisturbed soil cores to determine soil mass per unit volume.
- Soil Carbon sampling, which uses auger cores to collect and composite samples from different depth intervals for carbon analysis.
4. SAMPLING PREPARATION
The equipment mentioned in the list below needs to be gathered, checked and packed before sampling begins. If any sensors need to be configured prior to commencing sampling this will be documented below the equipment list.
4.1 EQUIPMENT LIST
- 7 X 50 m measuring tapes
- 1 m measuring stick
- a large bucket (~20 L)
- a small trowel
- soil auger
- bulk density measuring kit (containing bulk density ring, ring holder and hammer)
- knife or piece of hard plastic with a straigh edge
- 4 X 1 L ziploc bags per plot for storing bulk density samples
- 8 X 2 L ziploc bags per plot for storing soil carbon samples
- permanent marker
- handheld GPS
- tablet with S123 loaded and a functional camera
4.2 DEVICE CONFIGURATION
- The S123 app needs to be loaded onto the tablet and the ABP Soil Carbon Survey needs to be loaded.
- Station locations need to be loaded onto the handheld GPS.
5. SAMPLING PROCEDURES
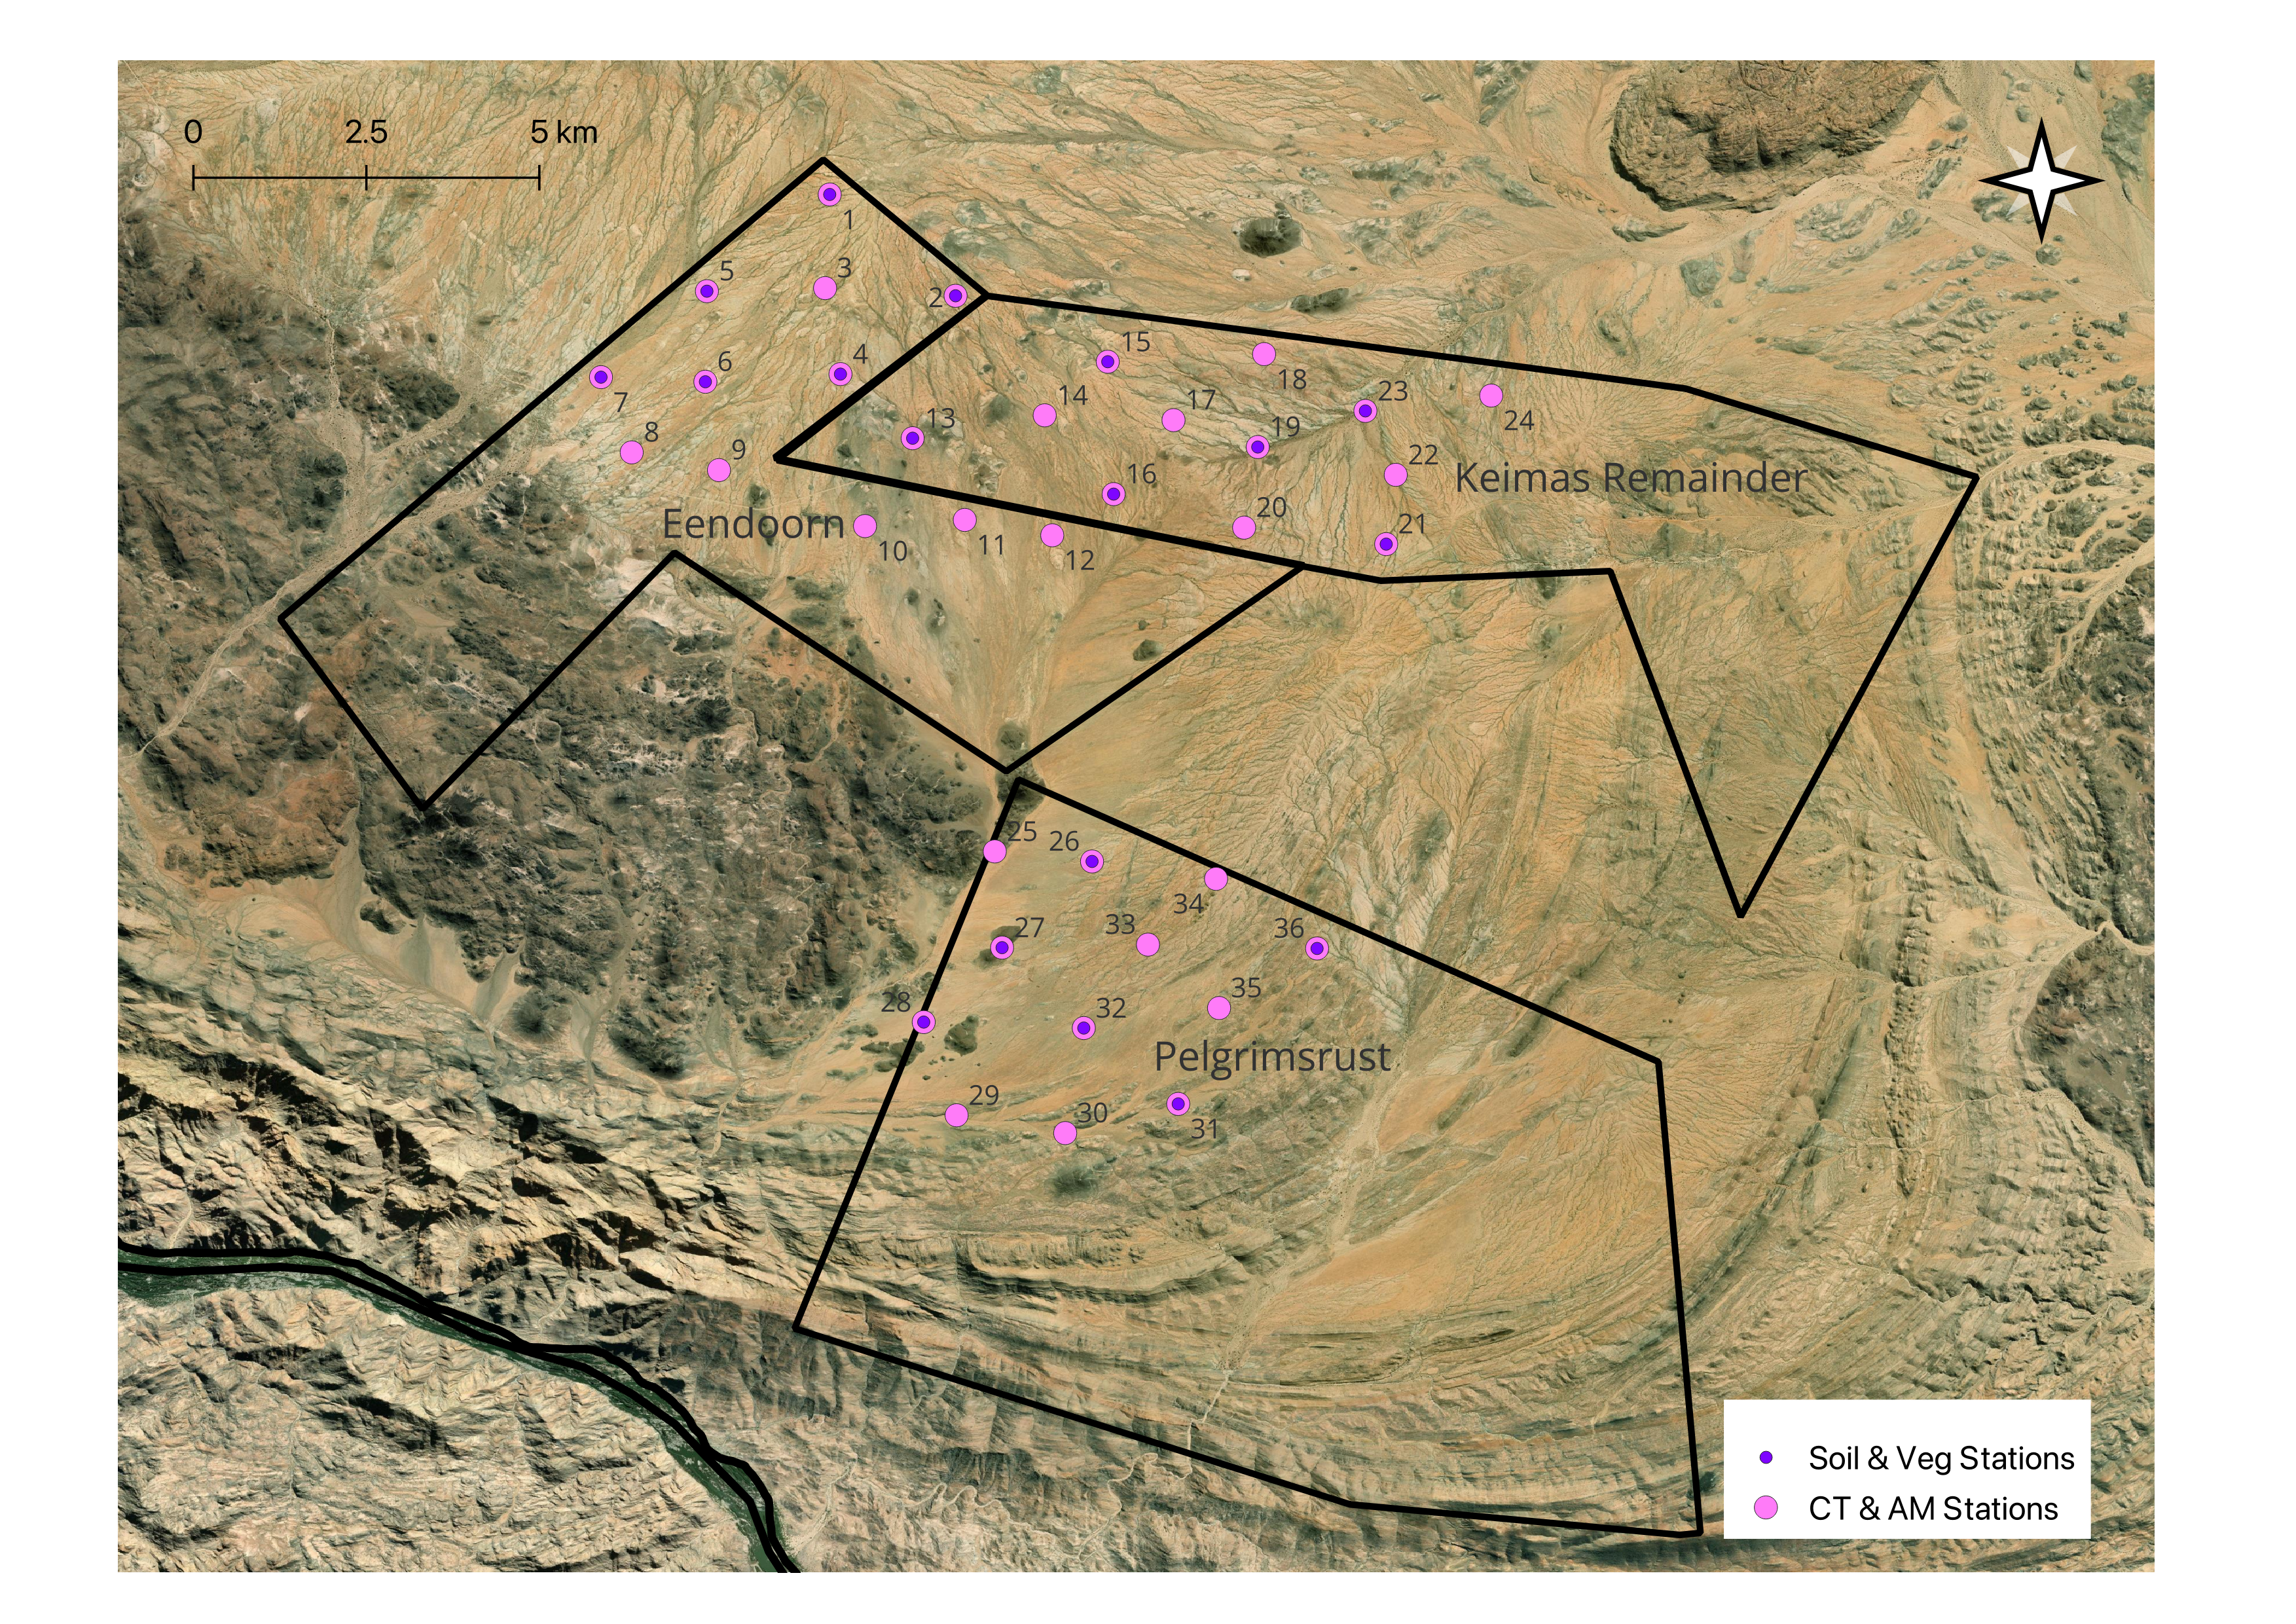
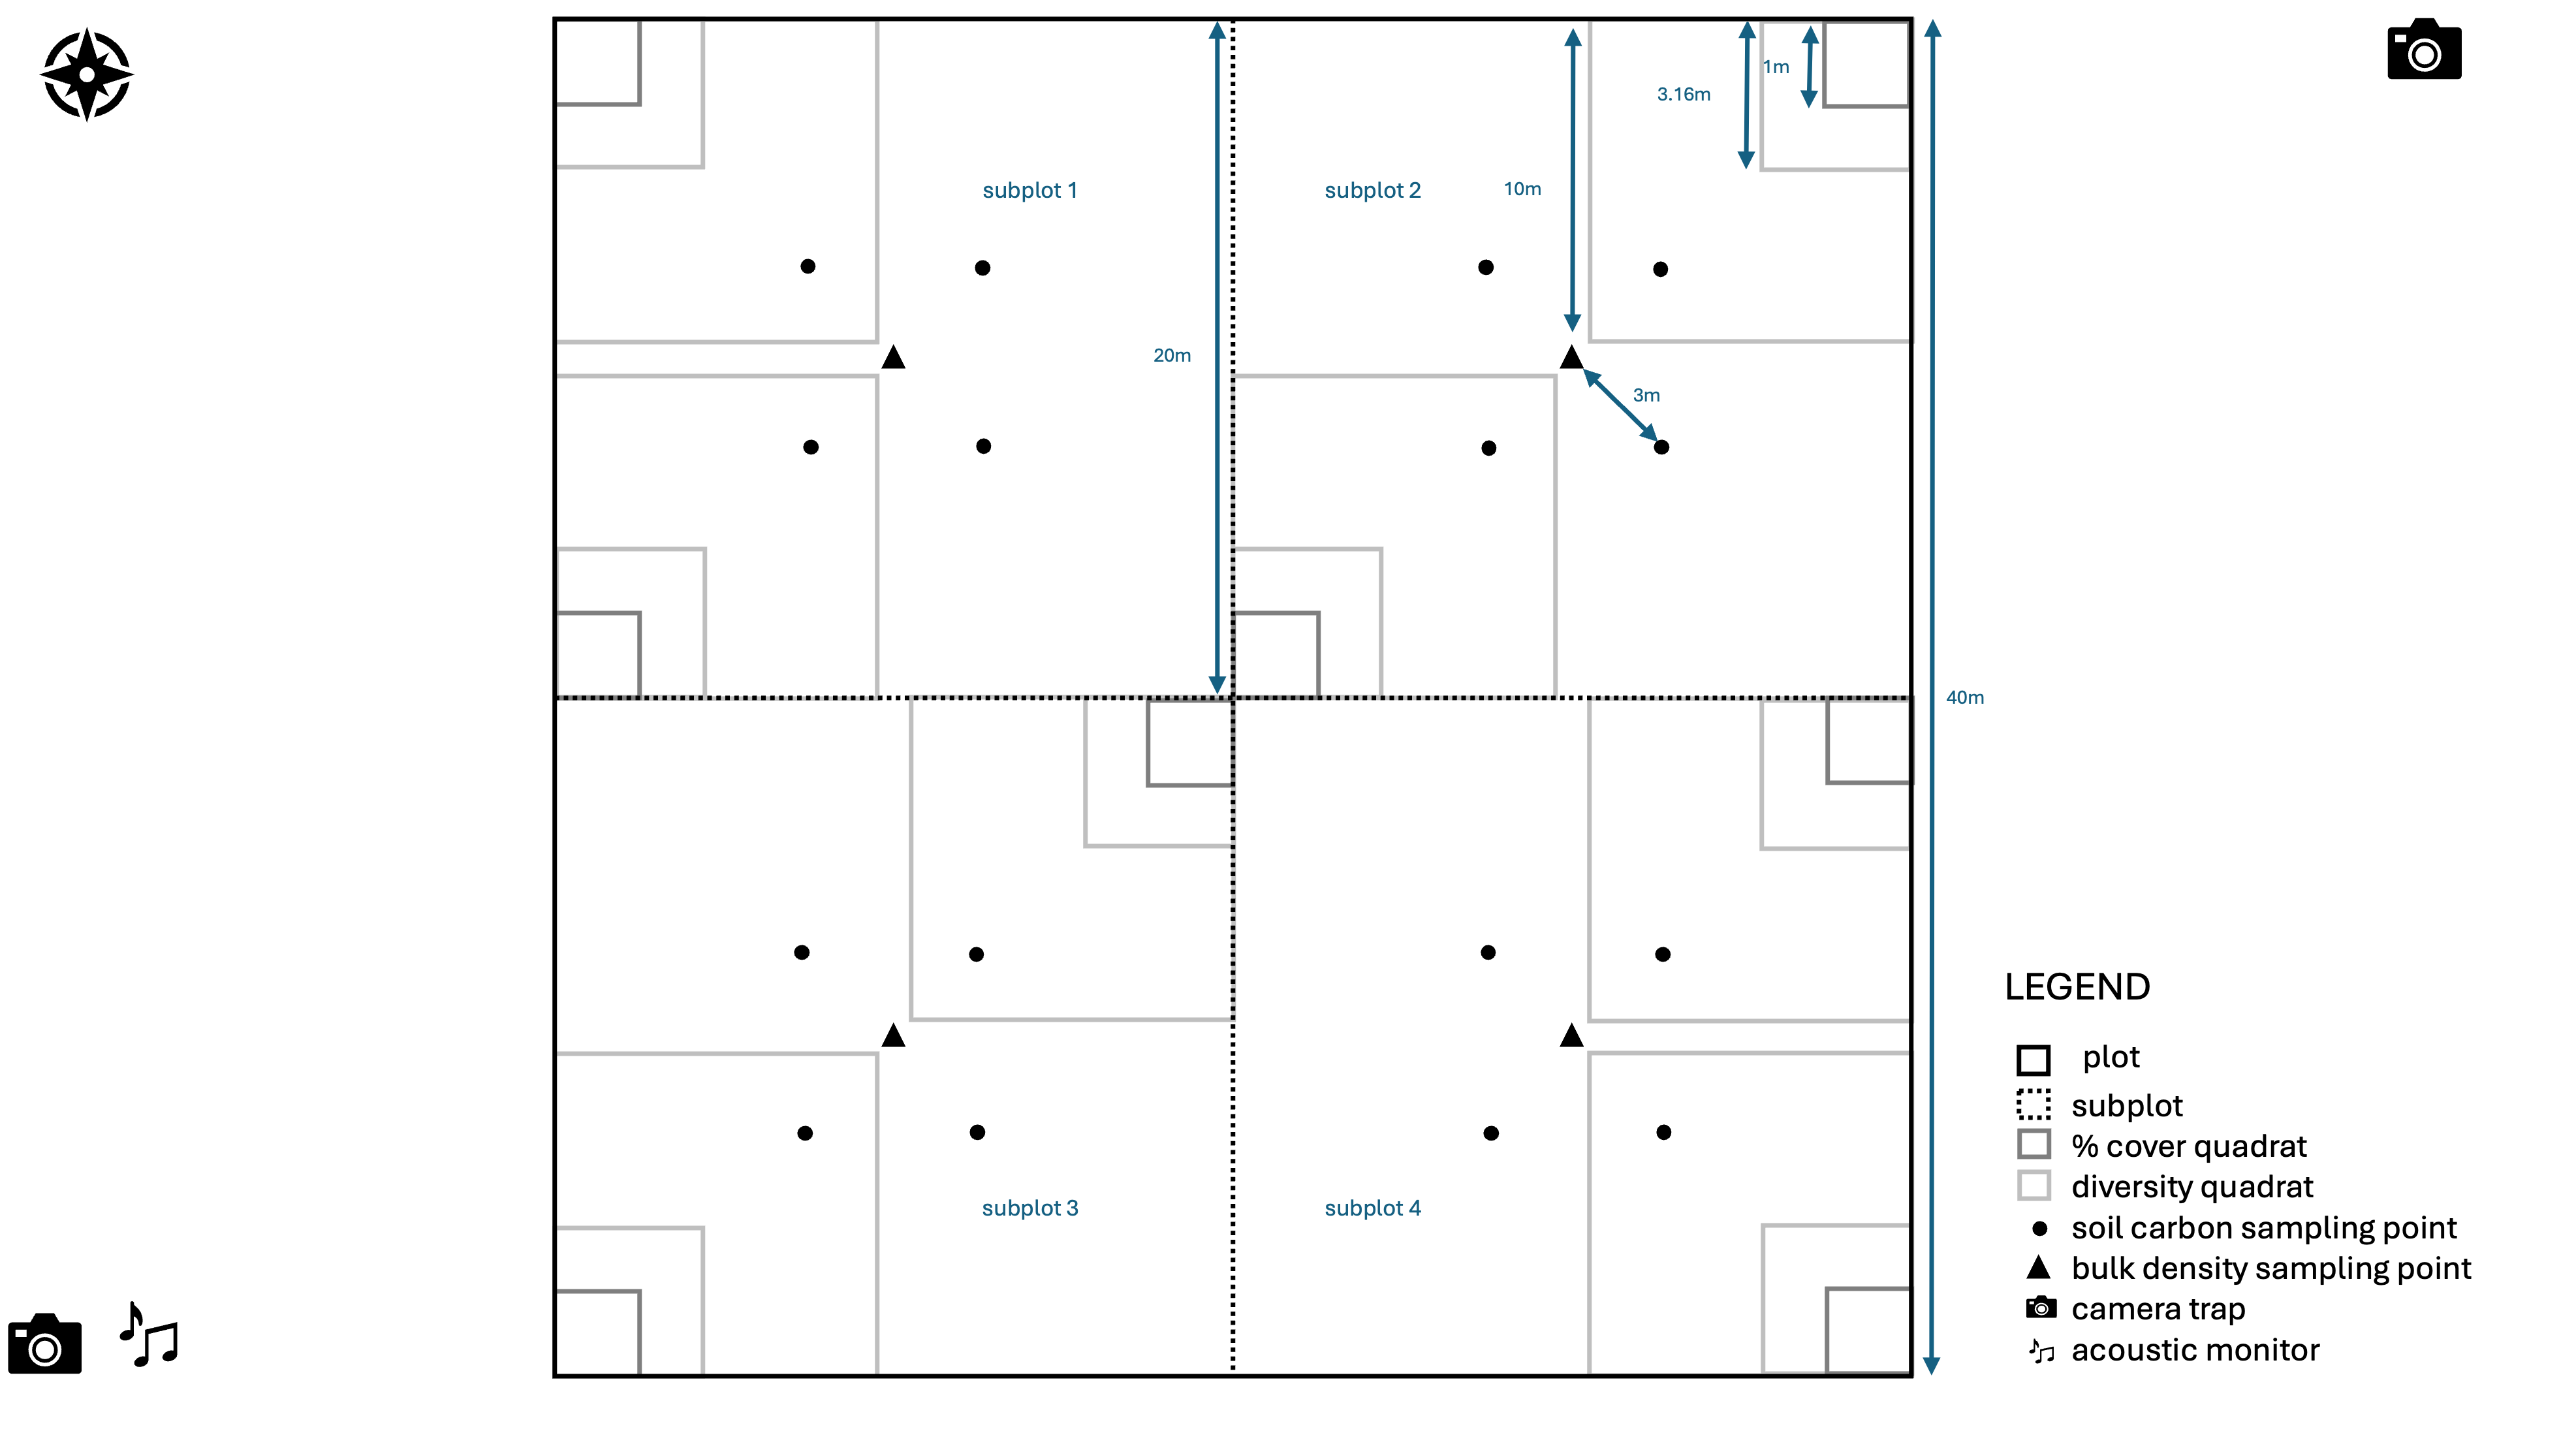
These methods for monitoring soil carbon in arid lands require the establishment 40 m X 40 m plots. Each of these plots will be divided into four subplots, and soil carbon and bulk density sampling will occur in each subplot. One bulk density sample should be taken in the middle of each subplot, and each sample should be placed into a ziploc bag and labelled with a QR code. Then four soil carbon samples should be taken per subplot at two depths: 0 - 20 cm and 20 - 40 cm. The four soil carbon sampling locations per subplot should be located in a square oriented in the same direction as the plot, with each corner 1 m radially out from the centroid of the subplot. First, the four samples from the depth of 0 - 20 cm should be taken and mixed together in the large bucket. A subsample of the mixed samples (1/4 of the total volume) should then be placed into a ziploc bag and labelled with a QR code. Then the same procedure should be repeated for the samples from the 20 - 40 cm depth. Sampling at both depths must be repeated in all four subplots. Six plots will be sampled per property, paired to existing sampling sites from the camera trap and acoustic survey. These six plots will be the same for the vegetation survey.
5.1 BULK DENSITY SAMPLING
- Navigate to the sampling location. This should be at the midpoint of the two camera traps deployed during the Arid Biocredit Pilot.
- Establish the extent of the 40 m X 40 m plot by running a 50 m measuring tape 20 m north and 20 m south and by running a second one 20 m east and 20 m west, intersecting at the sampling location, as shown above. Use another four 50 m measuring tapes to demarcate the 40 m edges of the plot. Run the last measuring tape diagonally from the centroid of the plot to the northeast corner.
- Open S123 and collect all metadata required by the Arid Soil Carbon Survey.
- Locate the centroid of this subplot which will be located at 17.68m along the diagonal measuring tape.
- Take a bulk density sample using the bulk density kit at the centroid of subplot 1. To do this place the bulk density ring into the ring holder and position the ring holder on a piece of ground that has not been stepped on or otherwise compacted. Hammer the ring holder into the ground until the engraved line on the outside of the cylinder holder is flush with the ground. Use a trowel to carefully excavate the sample without compacting or disturbing the soil inside the ring. Use a knife or piece of hard plastic with a straight edge to flatten the top of the sample so that it is flush with the top of the bulk density ring.
- Place the bulk density sample into a 1 L ziploc bag, label the bag with a QR code and scan the QR code into S123. It is important that this sample is placed in a smaller ziploc bag than is used for soil carbon so that the different samples can be visually differentiated during procssing. If this is not possible label the ziploc bag as “bulk density” with a permanent marker.
- Repeat steps 4-6 for the remaining 3 subplots.
5.1 SOIL CARBON SAMPLING
- Use the 1 m measuring stick facing radially outwards towards the north east from the bulk density sampling location in subplot 1 to locate the first soil carbon sampling location.
- Use the soil auger to take a soil carbon sample from a depth of 0 - 20 cm.
- Put the soil carbon sample into the bucket.
- Move the 1 m measuring stick 90 degrees clockwise and take the second soil carbon sample.
- Put the soil carbon sample into the bucket.
- Repeat steps 4-5 for soil carbon samples 3 and 4.
- Use the trowel to meticulously mix the soil contained in the bucket.
- Use the trowel to place 1/4 of the soil from the bucket into a 2 L ziploc bag, label with a QR code and scan into S123.It is important that this sample is placed in a larger ziploc bag than is used for bulk density so that the different samples can be visually differentiated during procssing. If this is not possible label the ziploc bag as “soil carbon” with a permanent marker.
- Repeat steps 1-8 at a depth of 20 - 40cm.
- Repeat steps 1-9 for subplots 2, 3 and 4.
- Complete the S123 form and save.
6. POST PROCESSING
This section details all steps that need to be followed after returning to the office from the field to ensure that samples are properly processed and stored and that data is uploaded and saved to the correct location.
6.1 SAMPLE PROCESSING AND STORAGE
If samples contain wet soil the ziploc bags should placed in a safe, sheltered location be left open for enough days to allow the soil to dry. Bags then need to be closed for storage. Soil samples should be stored in a cool and dark location (out of direct sunlight) and transported to the lab at the University of Cape Town as soon as possible.
6.2 DATA ENTRY AND UPLOADS
S123 forms need to be sent to the cloud upon return to internet or cell phone reception.
7. RELATED DOCUMENTS
7.1 DESIGN DOCUMENTS
7.2 OTHER RELEVANT SOPS
7.3 DATA ELEMENTS
Survey Design
Data Collection
Dashboard
8. REVISION AND VERSION HISTORY AND DESCRIPTION
v1.0.0 Initial SOP created in March 2025. v1.0.1 Updates following field visit, incuding selection of the six sites per property. v1.0.2 Updates to the figure of sampling layout. v1.0.3 Updates to the post-processing steps. v1.0.4 Separated out bulk density and soil carbon sampling steps.