3 Docker Setup
What is Docker?
Docker is an open platform for developing, shipping, and running applications. Docker enables you to separate your applications from your infrastructure so you can deliver software quickly. With Docker, you can manage your infrastructure in the same ways you manage your applications.
Installing Docker Desktop
Docker Desktop is an easy-to-install application for your Mac, Windows or Linux environment that enables you to build and share containerized applications and microservices. We are installing Docker because it will not be possible to download or run the Machine Learning (ML) classifiers without it.
To install Docker, go to the official Docker Website and install the right application for your OS.
Thereafter, click the downloaded file to install Docker into your laptop.
NB: Ensure that you have WSL2 installed and running in your system before using Docker since Docker depends on WSL2 to run on a Windows computer.
Getting Docker Credentials
Sign up for Docker.
Ensure you remember your password.
There are two ways you can sign into Docker, using the password you provided during successful login or Personal Access Token (PAT).
When working with a group of people, a Personal Access Token (PAT) is more preferable.
To get a Personal Access Token, sign in to Docker Desktop. Select your avatar in the top-right corner and from the drop-down menu select Account Settings.
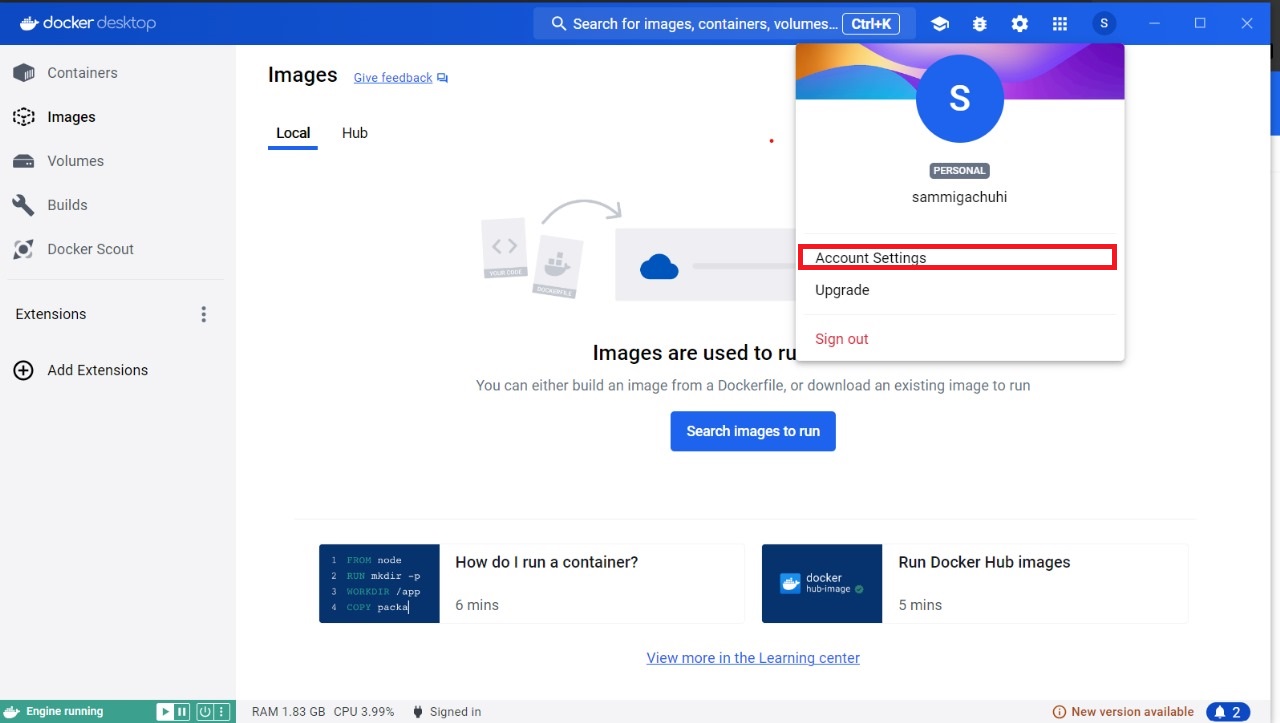
Doing so will take you straight away to the Docker Hub Website – hub.docker.com/settings/security.
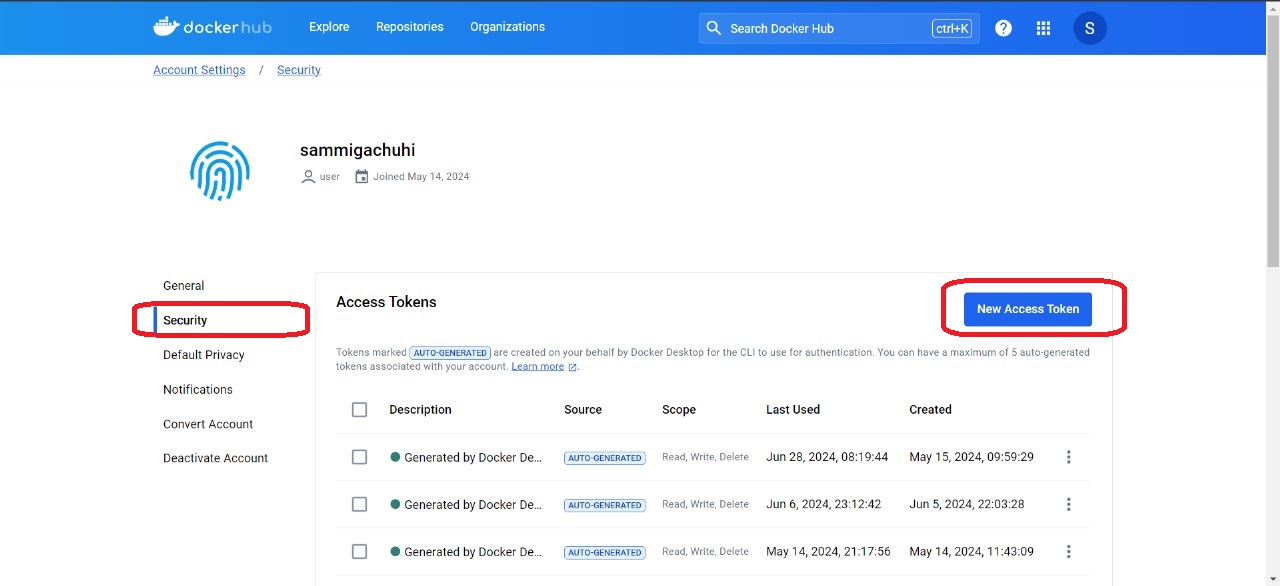
Select the Security tab and then New Access Token.
Add a description for your token. Use something that indicates the use case or purpose of the token. For this case, we shall use Xprize test description.
Set the access permissions as Read, Write and Delete. These settings allow you to access, push and delete docker images from your docker repository. The docker repository, officially known as Docker Hub, is the platform that stores your container images, much like Github stores your files.
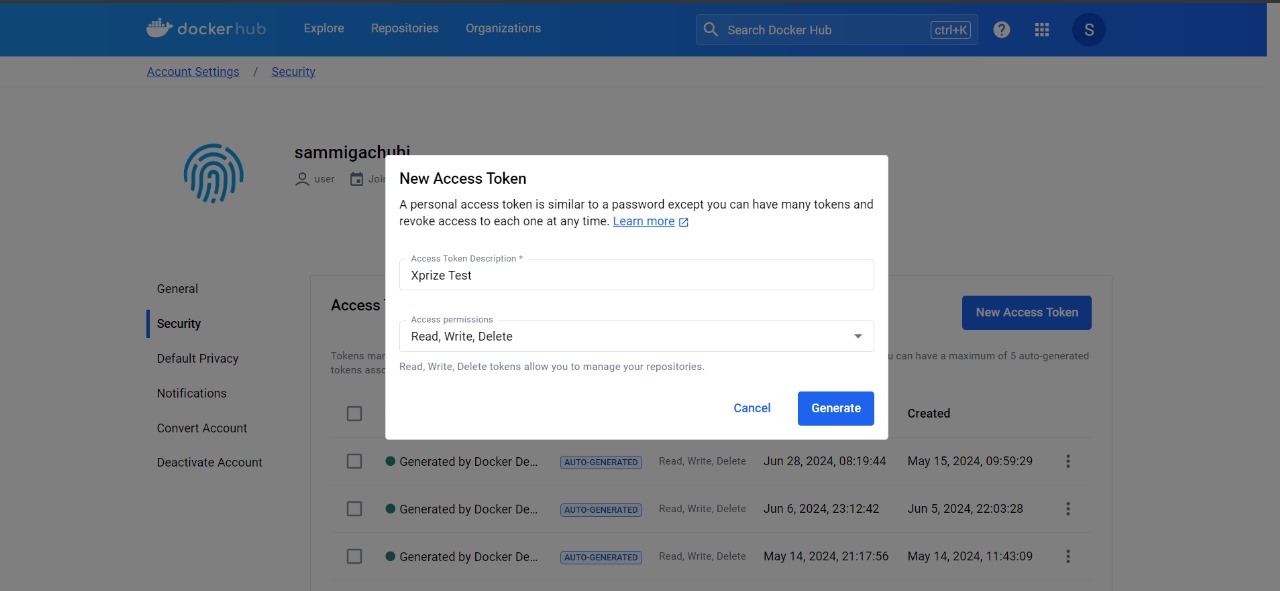
Select Generate and then copy the token that appears on the screen and save it. You won’t be able to retrieve the token once you close this prompt. It is imperative you copy the token to a text document such as Notepad, and save it in a secure place.
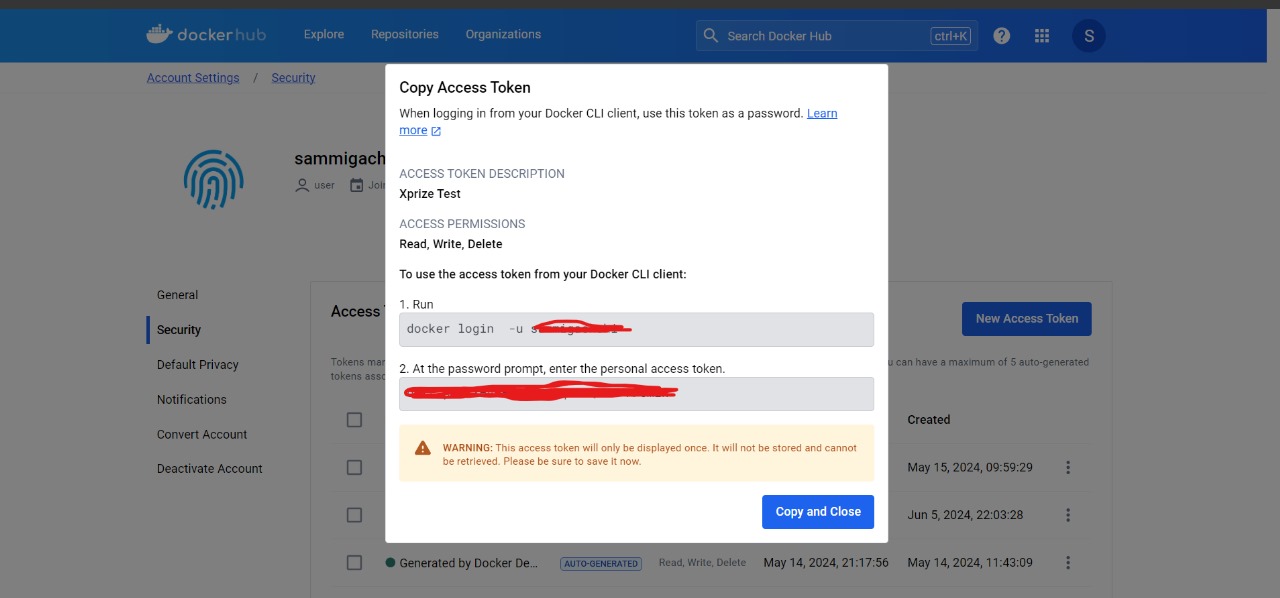
Docker Login via VS Code
If you’ve read Chapter 2 of VS Code installation, you are probably familiar with launching VS Code from the WSL2 terminal. Nevertheless, let’s proceed together.
Launch WSL2 terminal from Start menu.
Type ls to list all your directories and in case the xprize folder is not present, create it using this code mkdir xprize.
Move into the xprize folder by typing cd xprize/.
Launch VS Code from within the xprize folder by typing code .

Ensure that your terminal reads <yourusername>@<laptop-name>~xprize eg. sammigachuhi@gachuhi:~/xprize$.
Type docker login -u <your-docker-username>. Remember you can get your docker username from the account settings.
When prompted for password, insert the token your copied from your account settings. Just note nothing will be displayed on the terminal when you type (highly unlikely you will do this) or copy paste your token credentials, but just do it anyway and hit Enter.
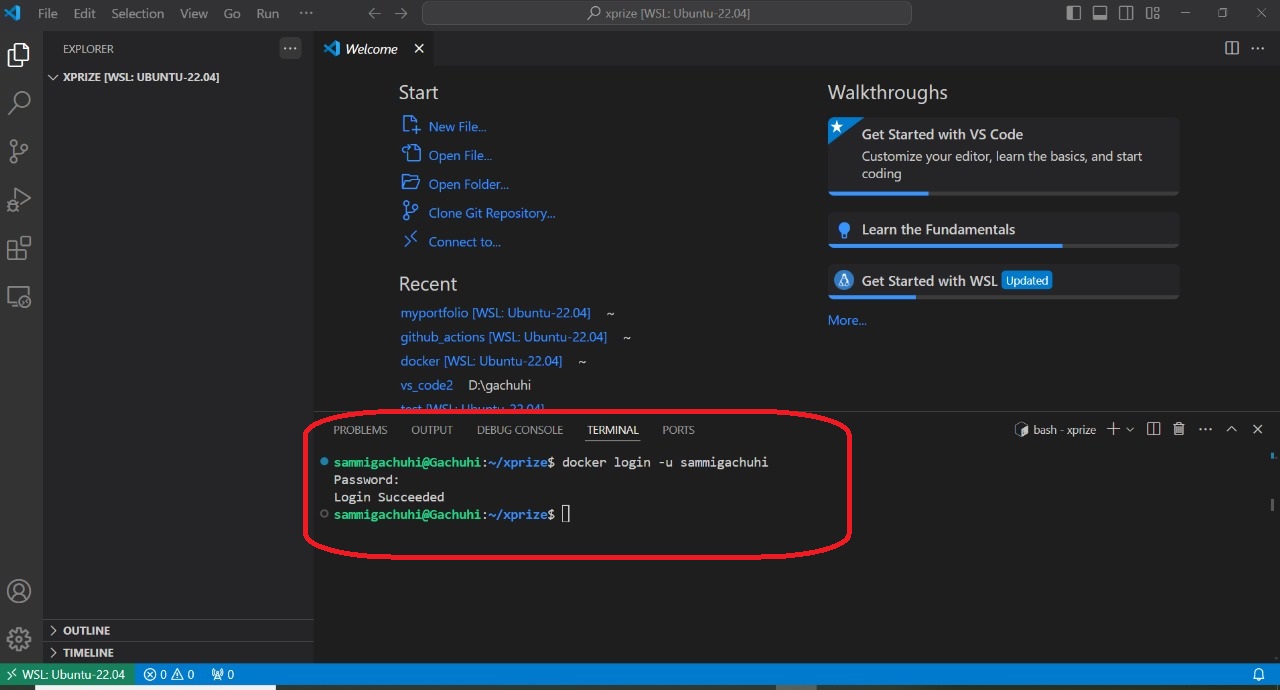
If your username and token credentials you copy-pasted are all right, your login should be successful.
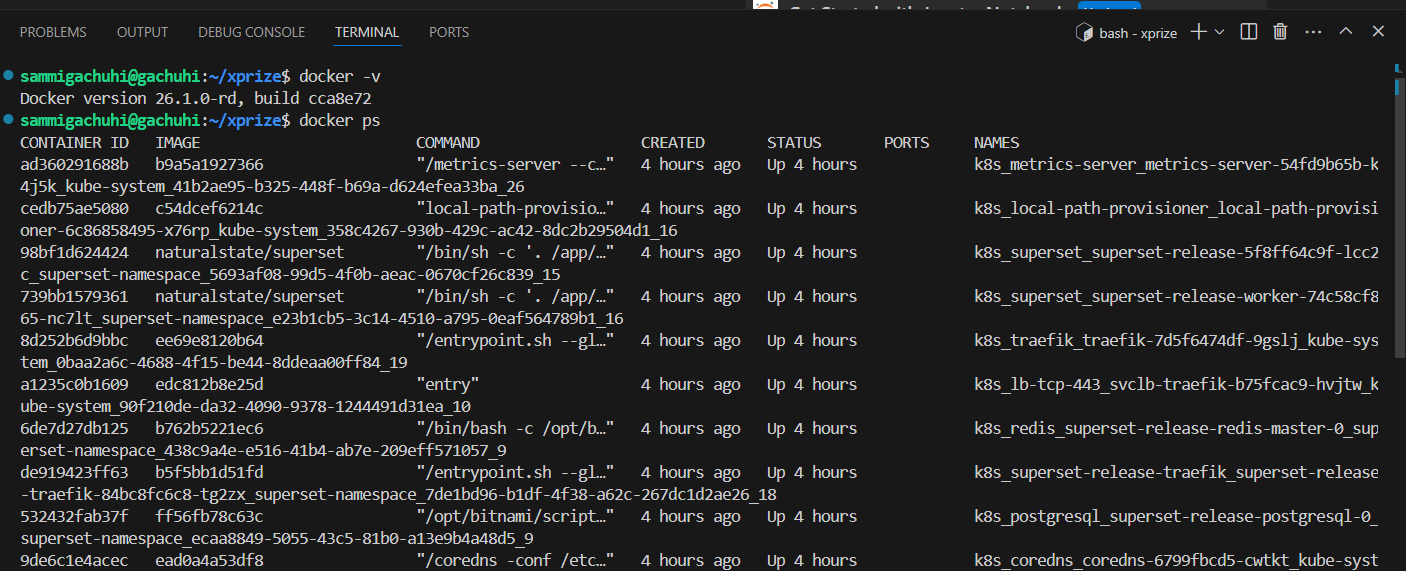
To ensure that Docker is running safe and sound, type the following in your bash terminal: docker -v to get the Docker version and docker ps to list all running Docker images, if any. As you can see I have a couple of Docker images running.
