1. Initial Setup
What is Windows Linux Subsystem?
Windows Subsystem for Linux WLS is a feature of Windows that allows you to run a Linux environment on your Windows PC, without the need for a separate virtual machine or dual booting. WSL enables developers to use the best of both Windows and Linux simultaneously. Without WSL one would need to run an operating system that behaves like a completely separate computer in an app window (virtual machine), or choosing a particular OS installed a priori during startup (dual booting).
Why install WSL?
Most of the technical department works on Linux computers or environments, and to be in sync with dependent systems, it is highly recommended that you should install it too.
WSL Installation
To install the WSL app, on your Windows PC, go to Start menu>Command Prompt and select Run as administrator. Type the following code:
wsl --install
This command will enable the features necessary to run Windows Subsystem for Linux (WSL) and install the Ubuntu distribution of Linux.
Once you have installed WSL, follow the Linux Distro setup instructions to the end. You will need to create a user account and password for your newly installed Linux distribution. Take note of these credentials.
If the WSL does not start after following the above steps, go to Microsoft Store and install the WSL app. Additionally, also install the Ubuntu app from Microsoft store.
Open the ubuntu app, follow the Linux Distro setup instructions.
Reboot your computer.
Go to Start menu, or type “WSL” in the search bar. Click on the WSL icon.
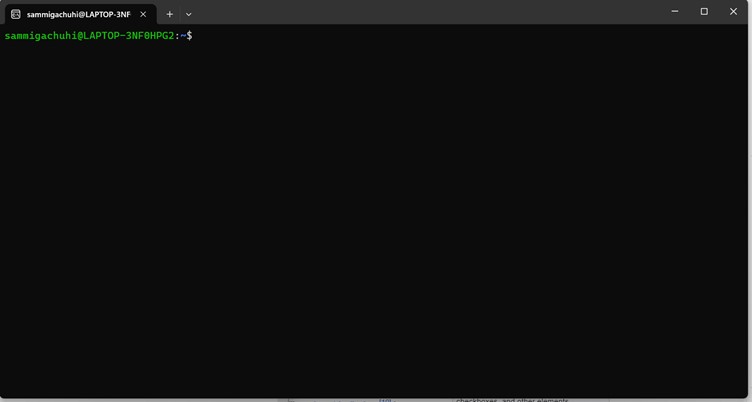
A text-based user interface such as the one below should appear.
Other Troubleshooting steps
In case the WSL app is present from the Start menu but clicking it does not open up WSL, follow the steps here
Azure Databricks in VS Code
What is Azure Databricks?
Databricks is a unified processing engine capable of analyzing massive volumes of data using SQL, graph processing, machine learning and real-time stream analysis. Databricks was formed from a joint effort between the companies ApacheSpark, Delta Lake and MLflow & Spark.
Azure Databricks is a managed version of Databricks developed in collaboration with Microsoft that enables quick and easy deployment and collaboration for all Azure users. As a data engineer, Azure Databricks enables execution of large-scale Spark workloads, with unmatched speed and cost-efficiency.
Installing Azure Command Line Interface (CLI)
The Azure Command Line (CLI) interface is a command-line tool installed for Windows computers that allows one to connect to Azure and execute administrative commands on Azure resources.
We are installing it because at VS Code, after configuring databricks (which we shall do shortly) VS Code will connect without databricks cluster through the Azure CLI. To install the Azure CLI, download the latest setup from here.
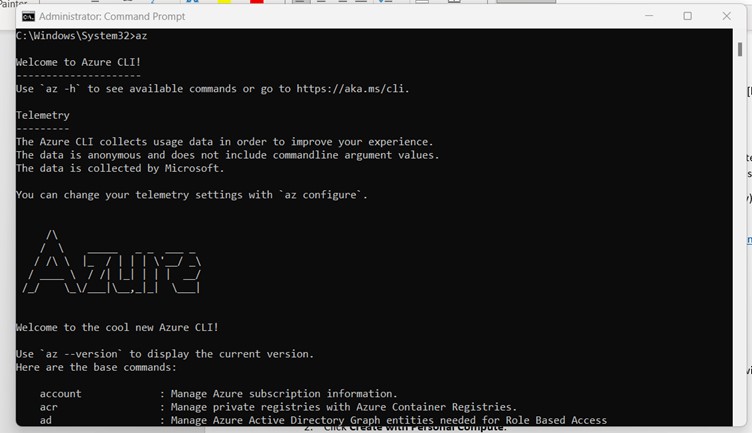
To test that Azure CLI has been successfully installed in your laptop, go to Command Prompt (CMD)>Run as administrator and type az. A string of commands should be printed out.
Installing VS Code
Installing VS Code in Windows should be straightforward. Download the windows setup from here.
Starting VS Code
As we had mentioned earlier, the technical team prefers to use Linux, and therefore it is highly recommended (mandatory) that you operate your code in a Linux environment. Because the WSL enables us to use Linux commands, we shall use WSL to open the VS Code IDE.
Open the WSL app from your Start menu. This is how it looks.
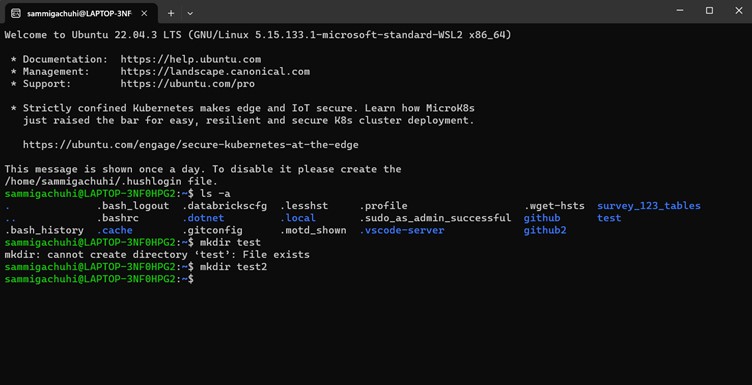
To create a new directory, you use the mkdir <directory_name> command. For example, in the above picture, we have created a directory by the name of test2.
By default, the WSL opens up in a directory of the following path: \\wsl.localhost\Ubuntu\home\<username_defined_during_installation>.
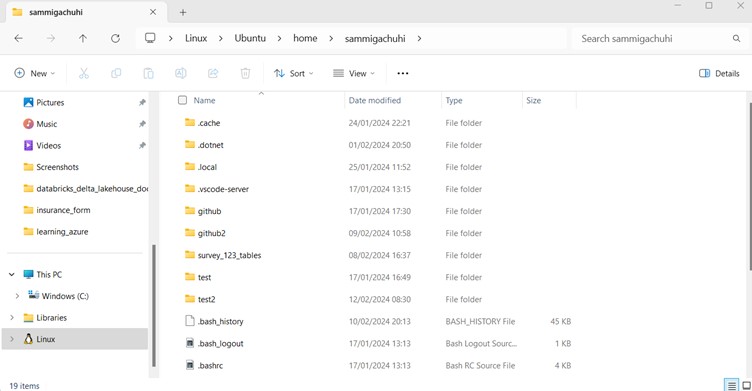
To view the list of directories inside your default directory, you use ls -a command. Assuming you have created a directory already, either from File Explorer or the mkdir command, you can move to that directory within WSL using cd <folder_path>. Keep using that command in conjunction with ls -a until you get to your desired directory of interest.
To open up the VS Code within your directory of interest, type code . For example, in the below image, we navigated into the directory …/github/NIP-Lakehouse-Data/dab and opened VS Code within the dab folder.

Connecting to Azure Databricks in VS Code
NB: This sections assumes that you have an already existing personal compute cluster. Otherwise, to create one, follow the below steps:
- In your Azure Databricks workspace, on the sidebar, click Compute.
- Click Create with Personal Compute.
- Click Create compute.
- Make a note of your cluster’s name as you will refer to it from the Databricks extension of VS Code.
The Databricks extension for Visual Studio Code enables you to connect to your remote Azure Databricks workspaces from the Visual Studio Code integrated development environment (IDE). With Databricks extension for VS Code, you can:
• Synchronize local code that you develop in Visual Studio Code with code in your remote workspaces. • Run local Python code files from Visual Studio Code on Azure Databricks clusters in your remote workspaces. • Run local Python code files (.py) and Python, R, Scala, and SQL notebooks (.py, .ipynb, .r, .scala, and .sql) from Visual Studio Code as automated Azure Databricks jobs in your remote workspaces.
On the VS Code, go to the Extensions tab to the left, and search for databricks.
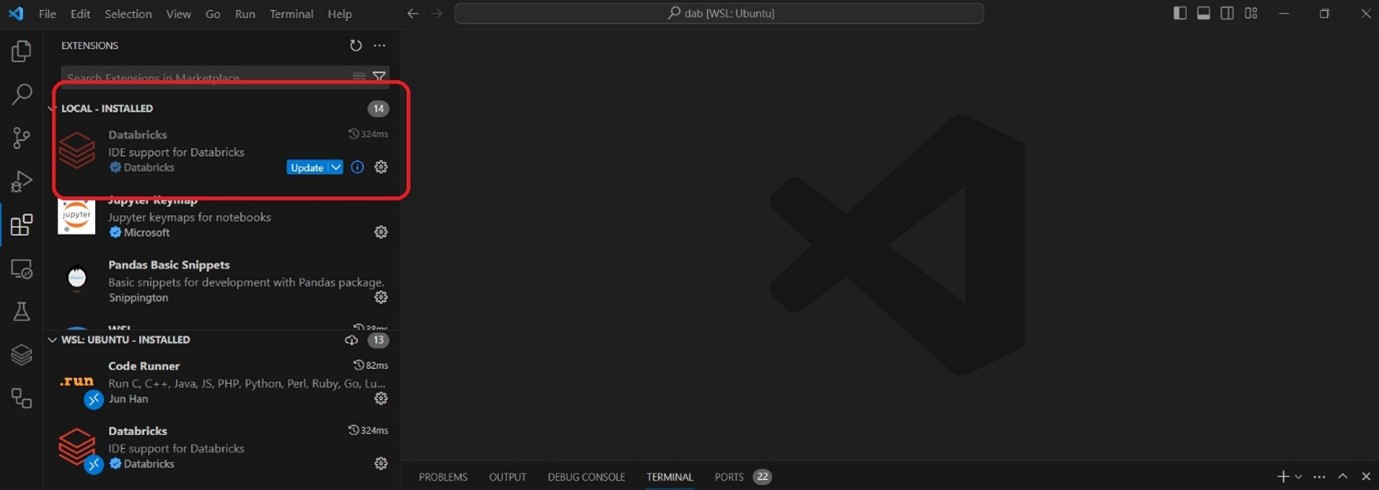
Install the extension.
If necessary, reboot your VS Code. On restarting VS Code, there will be a new Databricks icon to the left, below the Testing menu. Clicking on it will reveal an interface with two options: • Configure Databricks • Show QuickStart.
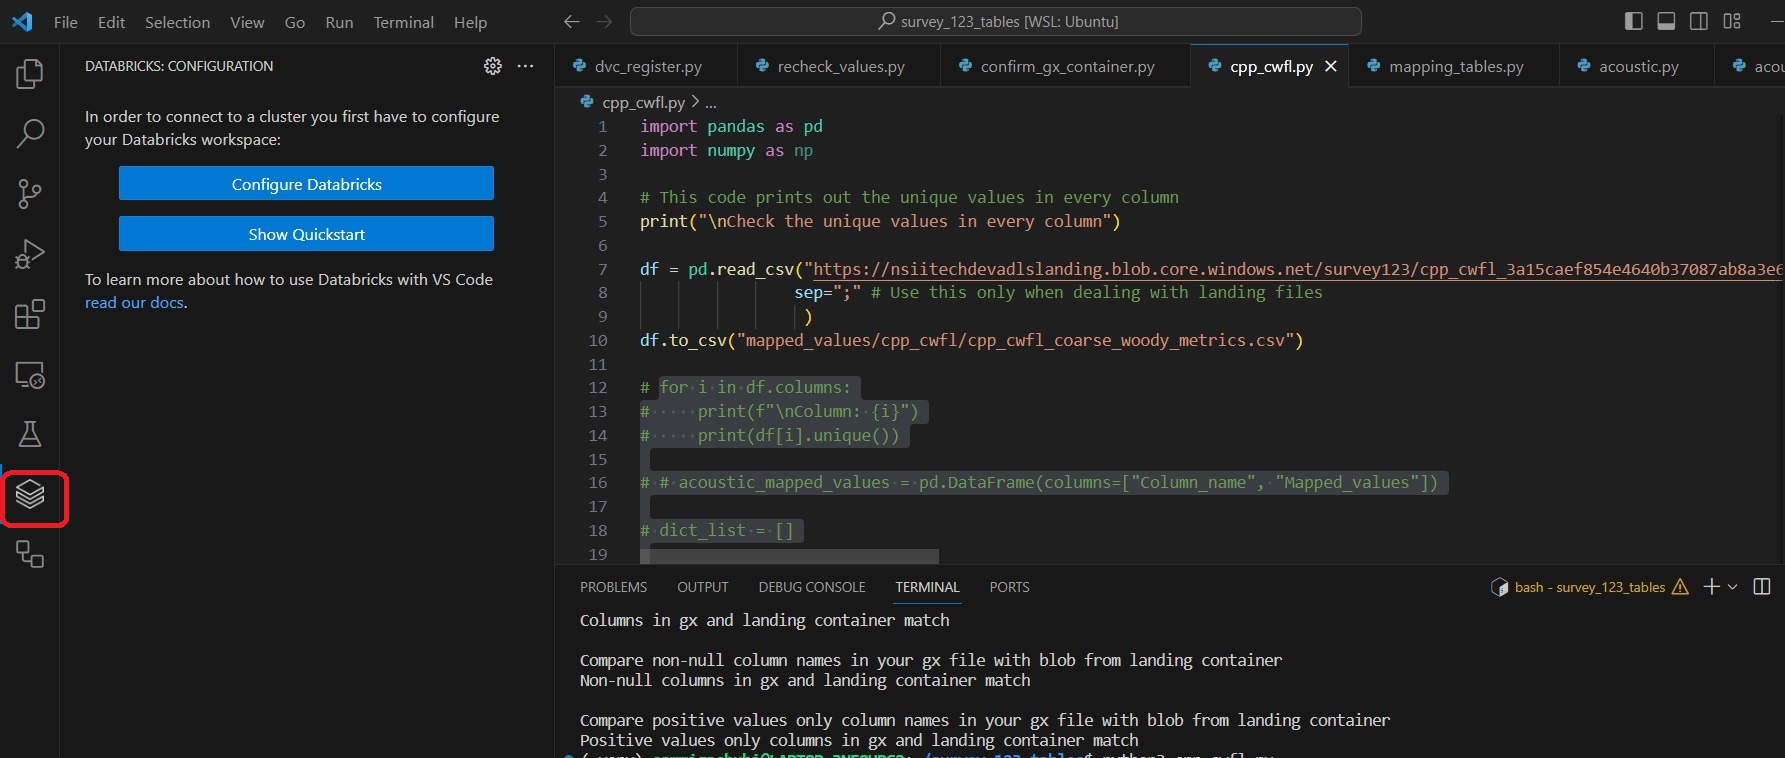
Click the Configure Databricks option.
A drop bar will appear at the top of the VS Code canvas as shown below.

Configuring databricks requires a databricks host url. This refers to the url link of your databricks account. To get this url, simply sign in to an Azure workspace and copy the url link at the top. It should be in the format of ` https://adb-<your -workspace -url-xxxxxxxx.azuredatabricks.net/>`.
Paste your workspace url as the host url.
The interface changes to show three options: • OAuth (user to machine) • Azure CLI • Edit Databricks profiles
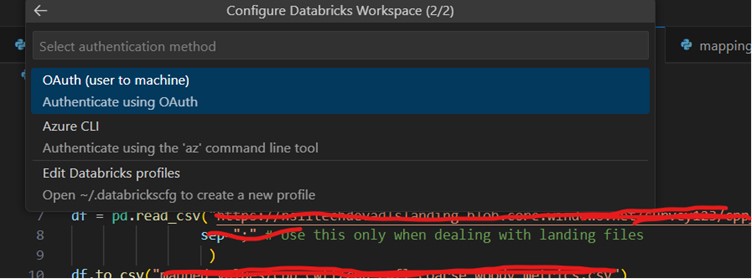
Click on Azure CLI. Wait for Databricks to connect. The configuration interface changes to reflect your Azure workspace.
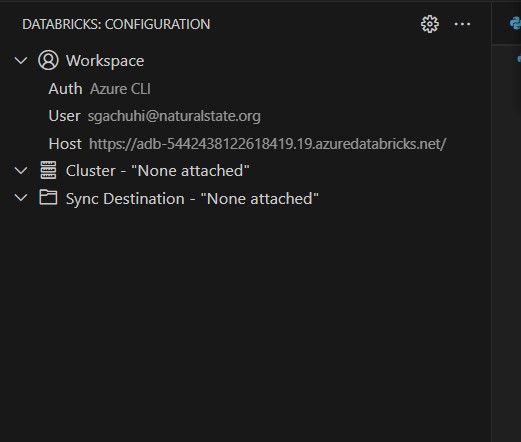
Notice that your Workspace dropdown contains your email and host url. It also contains other dropdowns specifically Cluster and Sync Destination. To finalize on your databricks configuration, select your VS Code cluster and Sync Destination.
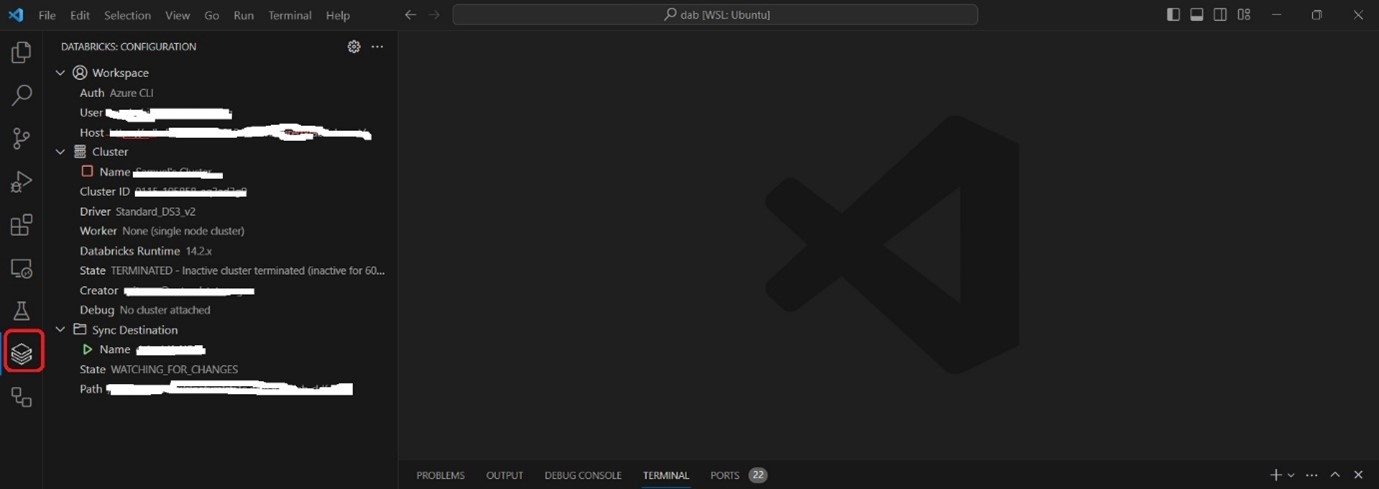
Once the above steps are completed, your databricks configurations should match the image shown below.
